This lesson covers Smarthistory’s best practices for photography. Most of these tips are about how to shoot in a gallery, but the same practices can be used for architecture or works of art that are outdoors.
Our next lesson shows you how to edit your photos using Adobe Photoshop.
Jump to
- Choosing your camera
- Before you go out to shoot
- Etiquette
- Tips for taking better shots
- How we photograph for videos
- Tips on camera settings
- Common problems
- More on cameras: functions, sensors, and lenses
Choosing your camera
You should use the best camera that your budget will allow. Here are a few of our recommendations:
- Look for a small, light camera that you will happily carry around all day. A high-quality pocket camera is expensive but tiny and incredibly capable. It’s a great choice for the serious beginner. For very high quality images and the ability to swap lenses, look at full frame mirrorless cameras. This will require a significantly larger investment.
- Look for the ability to control settings manually including f-stop, shutter speed, and ISO.
- Choose the largest possible light sensor in your budget.
- Choose the best lens(es) you can afford; a good lens makes a real difference.
- Choose a big, fast memory card.
- To save money consider purchasing last year’s model. You can also save money by purchasing used equipment, just be sure you trust the seller.
What we use
We use a full frame mirrorless camera and since we shoot in dim museums, churches, and archaeological sites, we use fast prime lenses (with large apertures that let in as much light as possible) that aren’t too heavy to carry around all day. Our lenses currently range from 18mm (very wide) to 110mm (telephoto). Our current kit includes:
Camera body:
- Sony A1 (mirrorless)
Lenses, listed from wide to telephoto (these are all FE, meaning they are designed for a Sony full frame body):
- 14mm f/1.8 Sony GM — amazing
- 50mm f/1.2 Sony GM — heavy but worth it for dark galleries, just amazing
- 70–200 f/2.8 Sony GM zoom OSS II — amazing (also Sony’s 2x teleconverter for distant exterior architectural details)when I need a macro
- 110mm f/2.5 Voigtländer APO-Lanthar, also a 1:1 macro (manual focus) — this one is heavy
Before you go out to shoot
Remember to always check that your camera is fully charged, and reformat your memory card so that you have ample space. We recommend wearing dark clothing with no patterns to minimize your appearance in reflections.
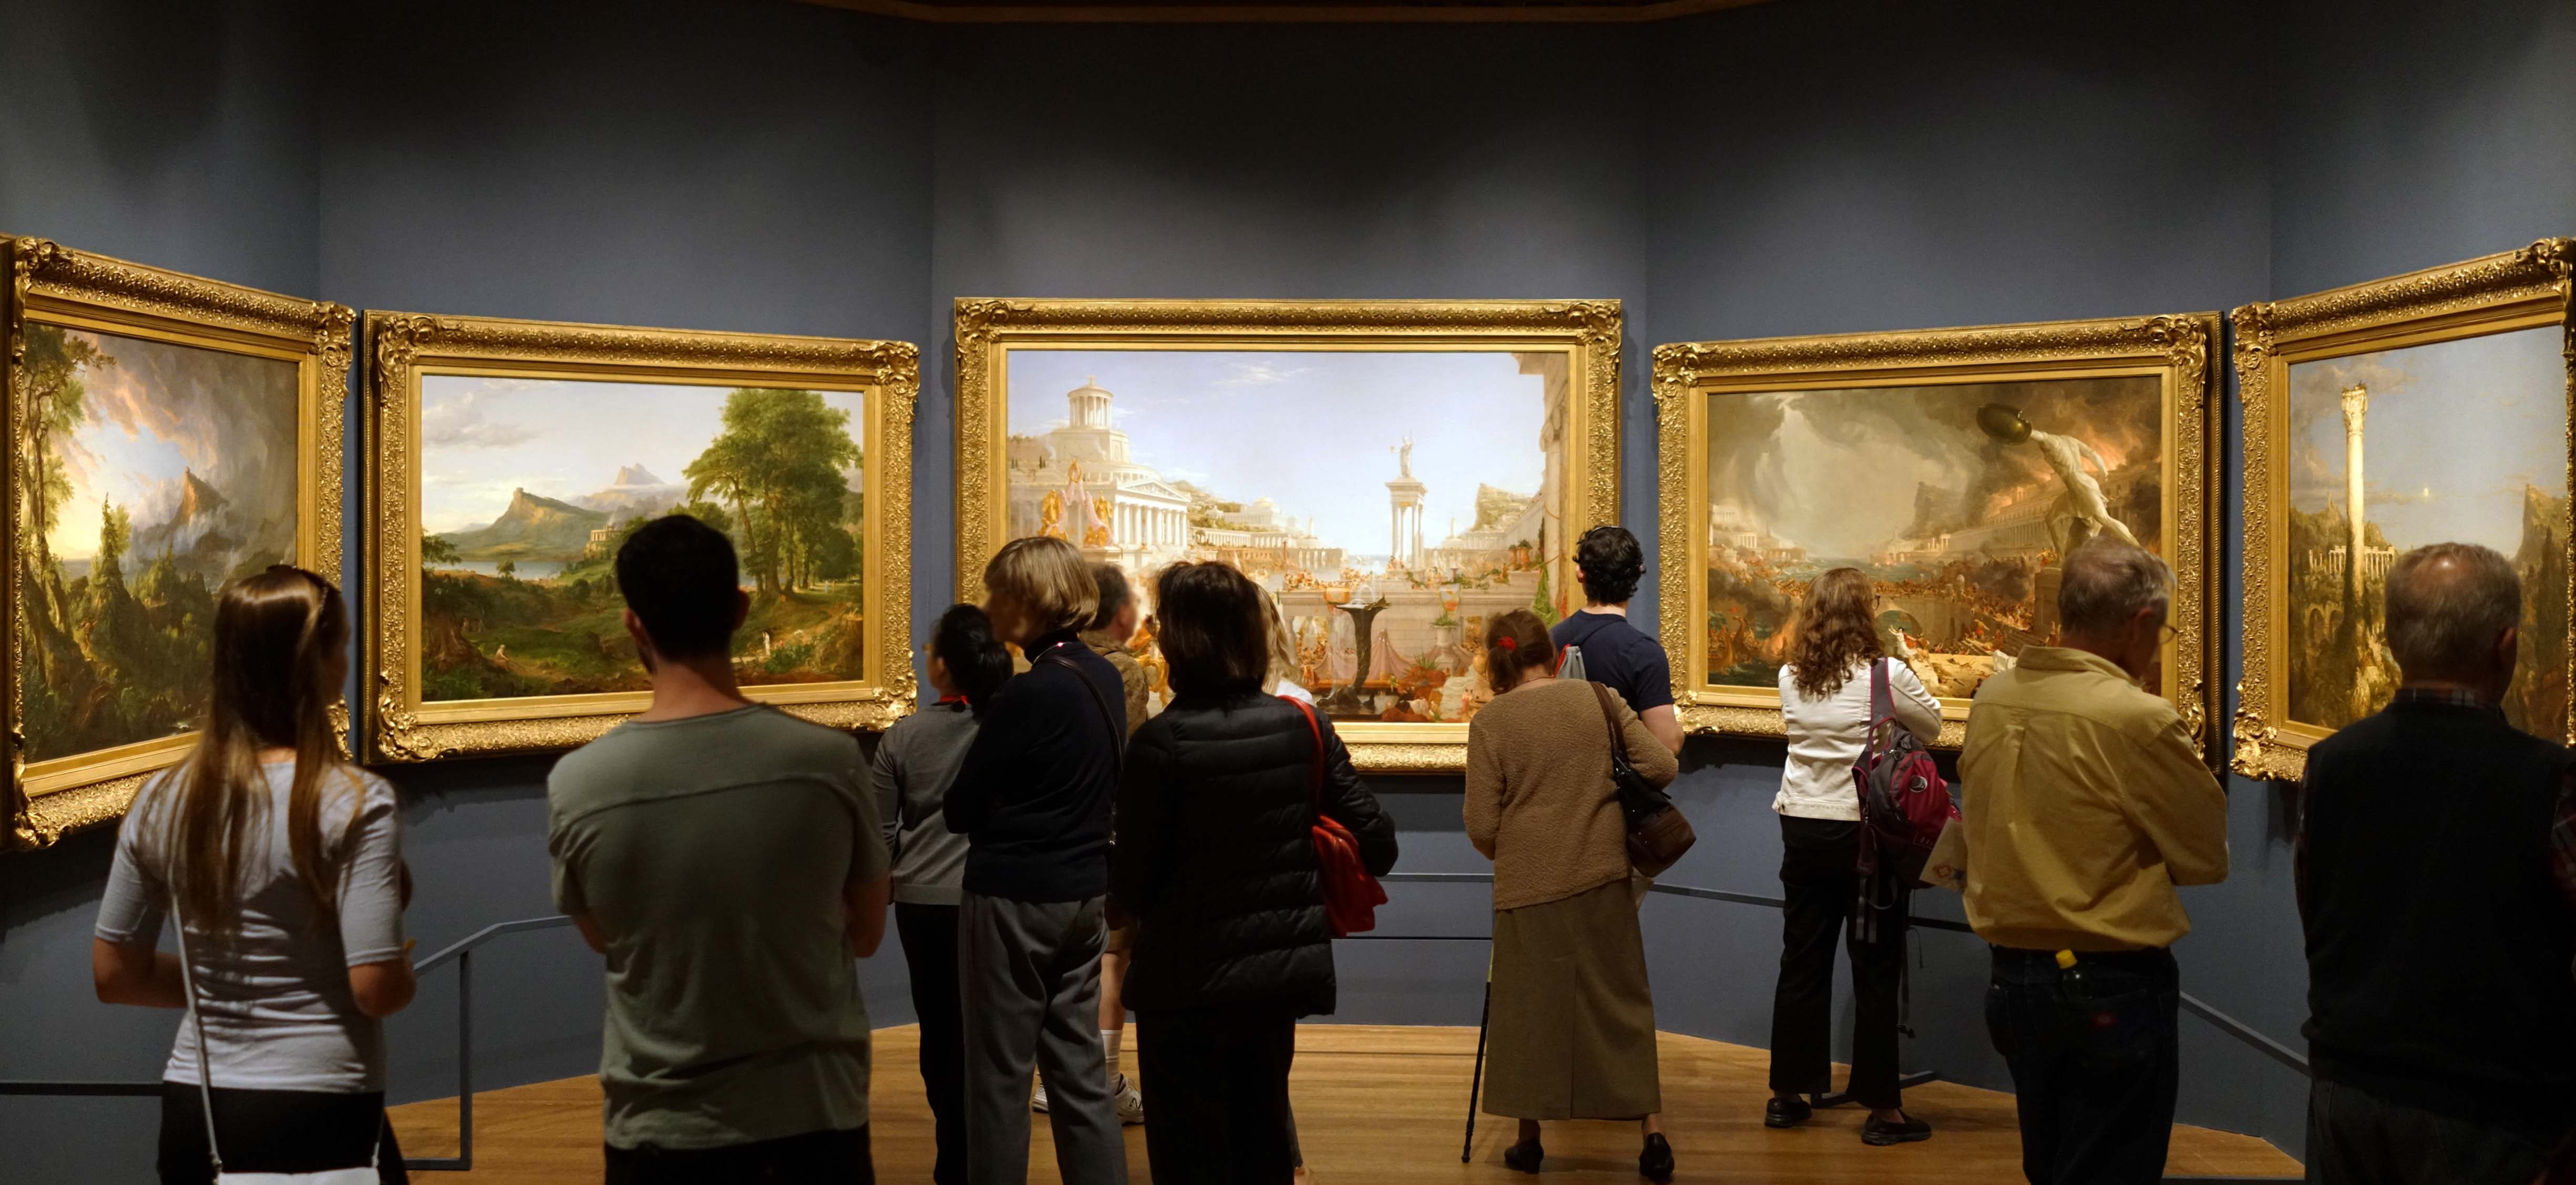
Visitors in a Thomas Cole exhibition at The Met view The Course of Empire
Etiquette
- The thing you’ll need the most during your photography session is patience and good humor.
- Photographing an object draws attention. We step back so others can look, or even snap their own shot.
- Be aware of privacy concerns. We photograph people from behind or blur faces in Photoshop.
- Follow stated institutional rules (this almost always means no flash or tripods).
Tips for taking better shots
- In order to take a sharp photo in the low light environment of a museum, your objective is be as still as possible. To do this, stand with your feet shoulder width apart. Hold the camera with two hands. Your left hand, palm up, cradles the lens; your right hand grips the right side of the camera body as your right index finger presses the shutter. Exhale slowly as you press the shutter.
- Be sure the camera is level and that nothing is cropped unintentionally, be aware of the how the subject is composed within the frame.
- Once your focus is set, take at least three to five shots in a row to increase the likelihood of a sharp, well-framed image.
- Take shots where the work nearly fills the frame, take some at a good distance for context, and take details close up.
- If the camera has a viewfinder, use it to frame your shot.
- Use a lens hood if you have one. It can reduce glare and increase contrast and clarity.
- For scale, perhaps include a person looking at the work (but be sure to protect their privacy).
- Stop midway through your shoot to review and make sure your settings are giving you the results you want.
- Walk around, look for new views at varying distances; this is especially important for architecture.
- Shooting outdoors? Avoid shooting when the summer sun is high in the sky, a low sun will generally give you better light.
- Most importantly, look carefully when shooting. Our brains filter visual distractions, but the camera won’t.
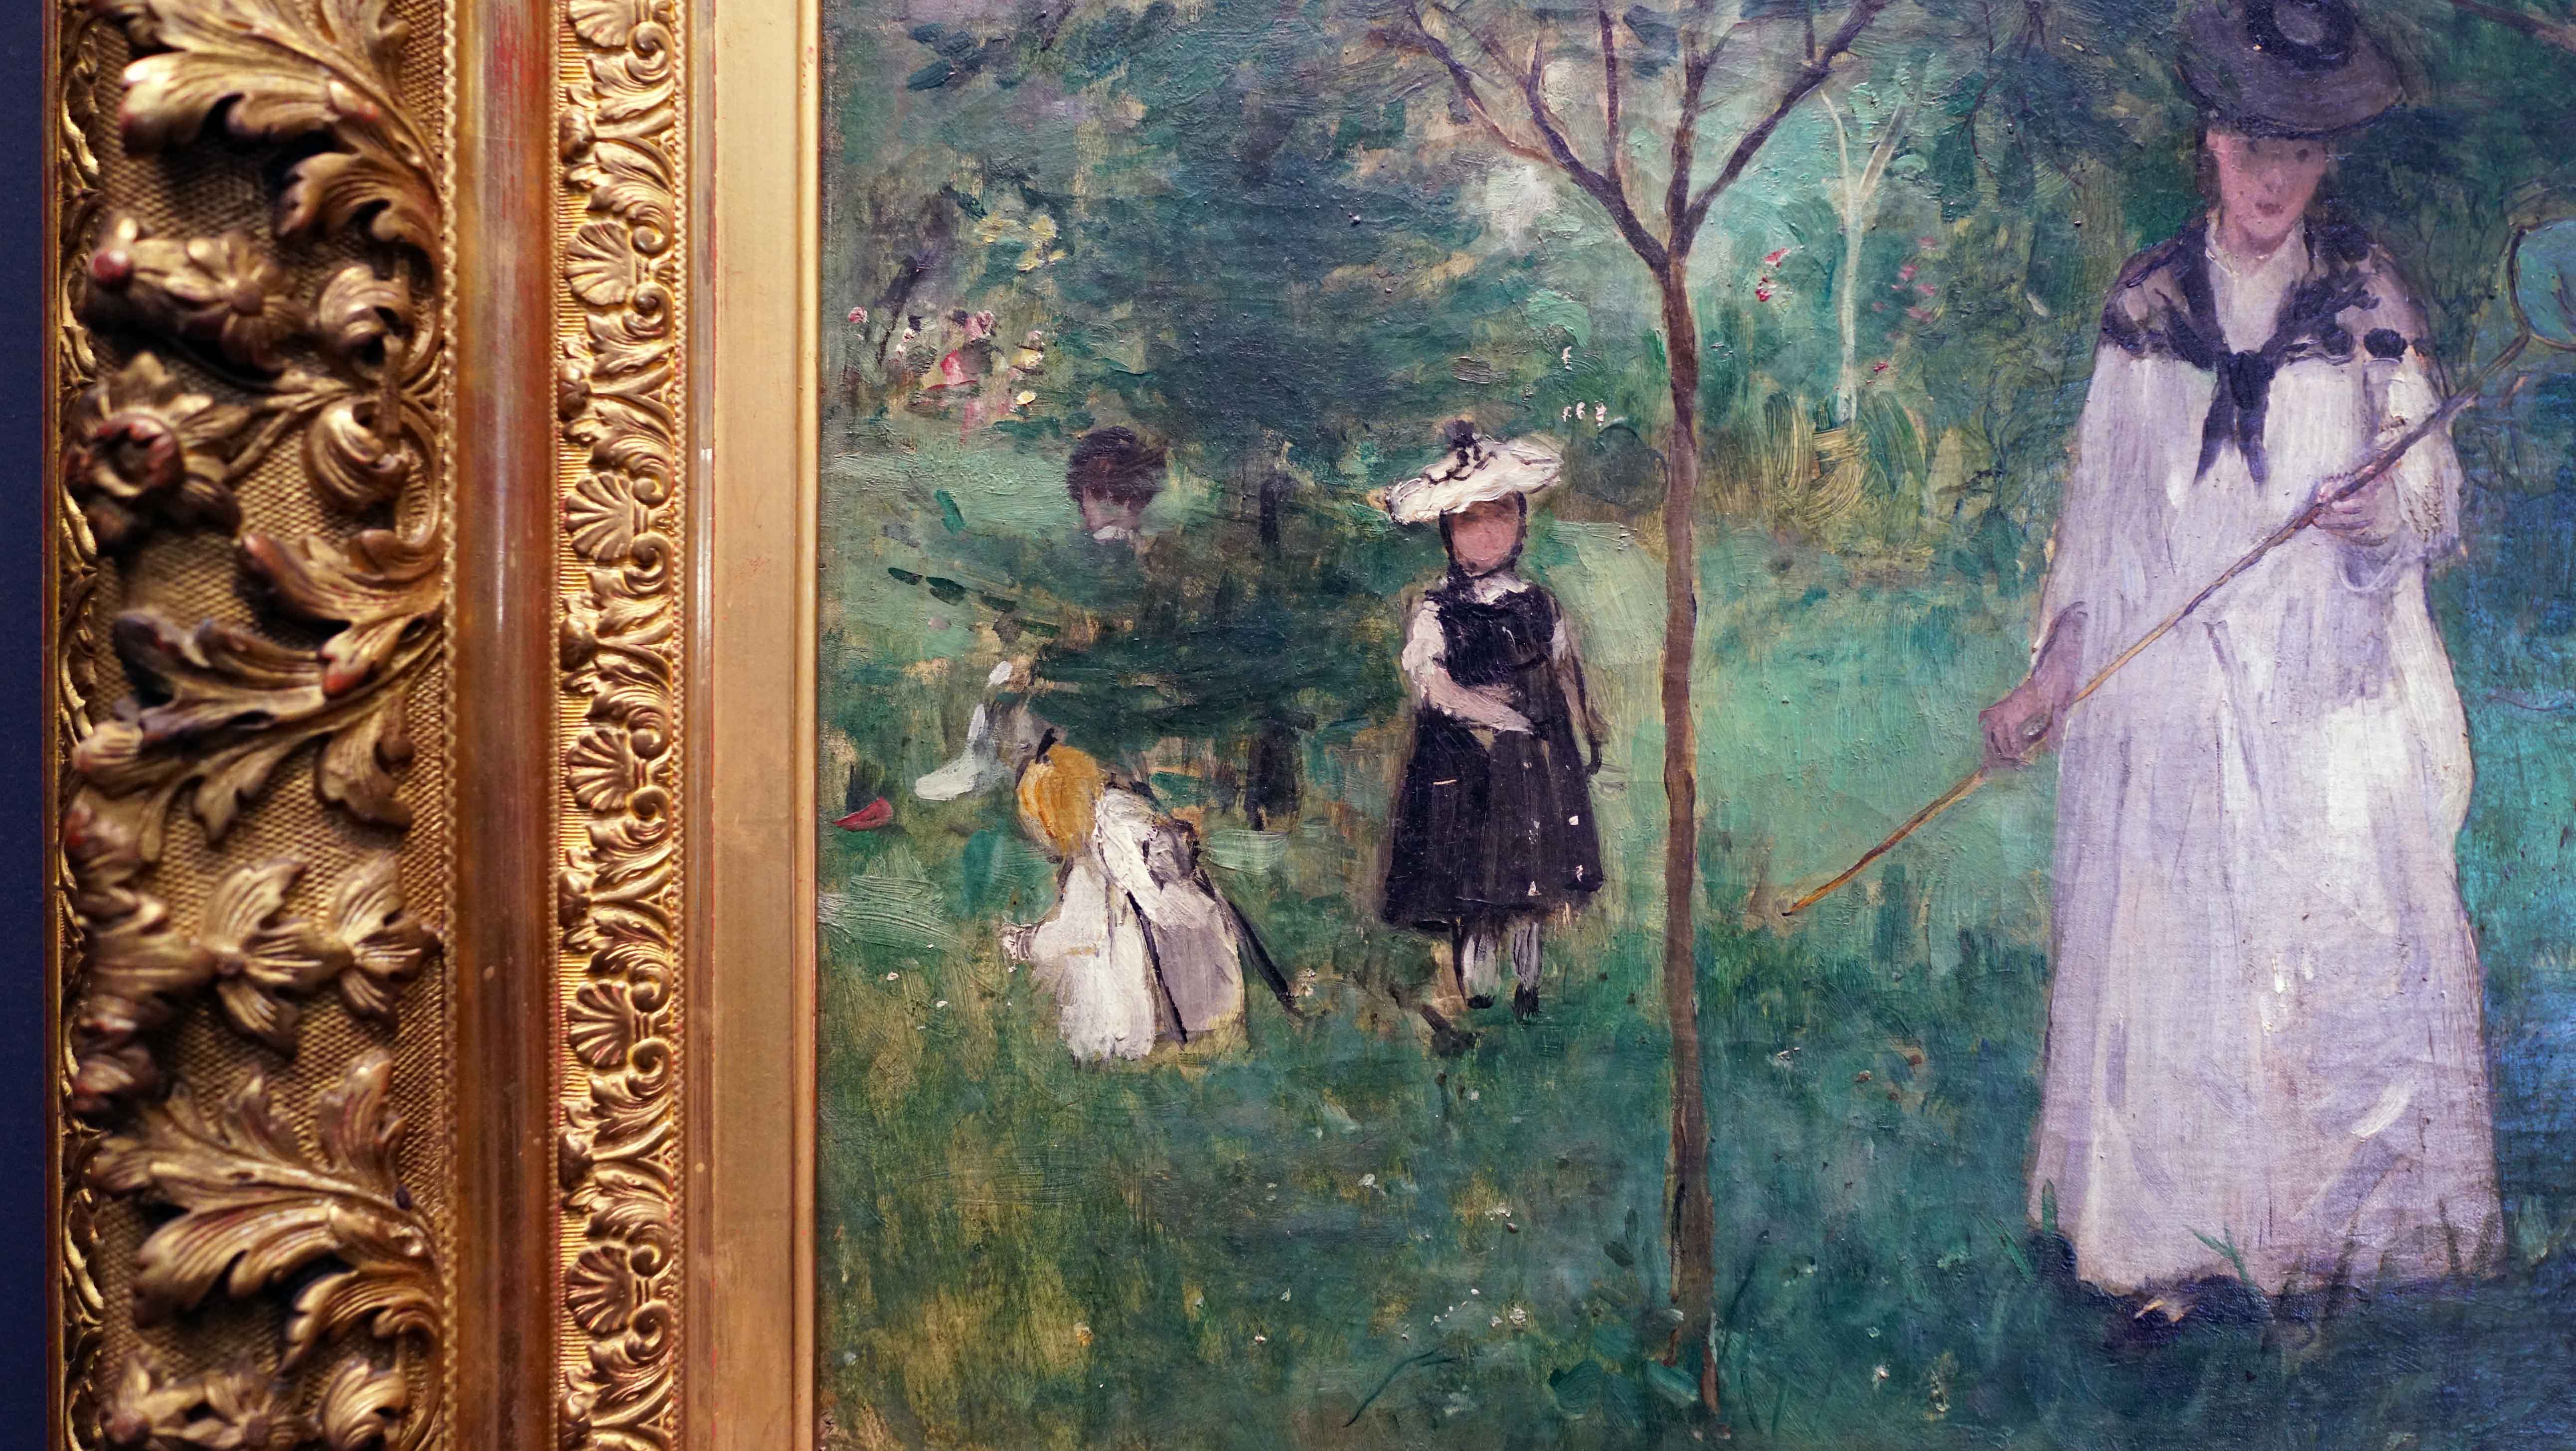
Berthe Morisot, Hunting Butterflies, 1874, oil on canvas, 46 x 56 cm (Musée d’Orsay, Paris) Here focus is on the children on the left edge of the canvas, note they are centered allowing for a view of the frame.
How we photograph for videos
On a typical day out, we may shoot up to 1,200 photographs—often 50 or more of each object. We take photographs directly after recording our raw audio conversation about the work, using the content of the audio to guide us as we think about the details we need to photograph. For instance, if we have discussed the brushwork in a particular part of a painting, or the way a sculpture appears from a certain angle, we make sure to capture good images of those particular features.
With very few exceptions, we shoot horizontally with a 16:9 aspect ratio, since the end use for the photos is 16:9 video. Because this is a very wide ratio, if you’re photographing something at the edge of a painting, you’ll end up including some frame and the wall beyond in order to center the detail. By keeping the detail in the center, you’ll minimize lens distortion.
We generally start wide and move in slowly. For each of the types of shots listed below, we typically shoot between 4 and 10 frames. This increases the chances that we will get a sharp, well-framed photograph of each.
- We start with two or more wide gallery shots from different angles, then move in step by step to wide shots, medium shots and closeups of the work.
- We make sure to get one good shot of the entire work, getting as close as we can while still including the whole work in the frame. In this case, the framing may be vertical in order to get the highest-resolution photo possible (we crop it later in Photoshop).
- We allow a small margin around the work so that we can easily correct for lens distortion later.
- Sometimes we include the frame of a painting if necessary when shooting details.
- If we have time at the end, we capture additional gallery shots from different angles.
Tips on camera settings
- Jpgs have improved but I still encourage you to shoot RAW instead if your camera can do that. RAW will capture data that jpgs miss and that you will be able to pull out in Photoshop when you edit your images.
- Take a variety of photos using different settings, in addition to auto, experiment with aperture(A) and shutter(S) priority. When you fee more confident, try full manual(M). I shoot fully manual. I also shoot RAW not jpg. See the “Basic Camera Functions” section below.
- Set the camera to automatically bracket (move the f-stop one click in each direction) to increase the likelihood of a well exposed photograph.
- If you are in a room with visual distractions, try adjusting your depth of field to narrow the range that is in focus. Use a low number on the aperture ring to open the camera’s lens. This lets in more light and reduces the depth of field (see photo below). Using shallow depth of field can blur the background. Conversely, closing your aperture will increase the area in focus.
- For closeups use “macro mode” if your camera has that setting.
- Don’t exceed your camera’s physical zoom capability (do not use “digital zoom”).
- Explore your camera’s white balance functions if available. Compare the color of your subject with what you see in the viewfinder, then adjust.
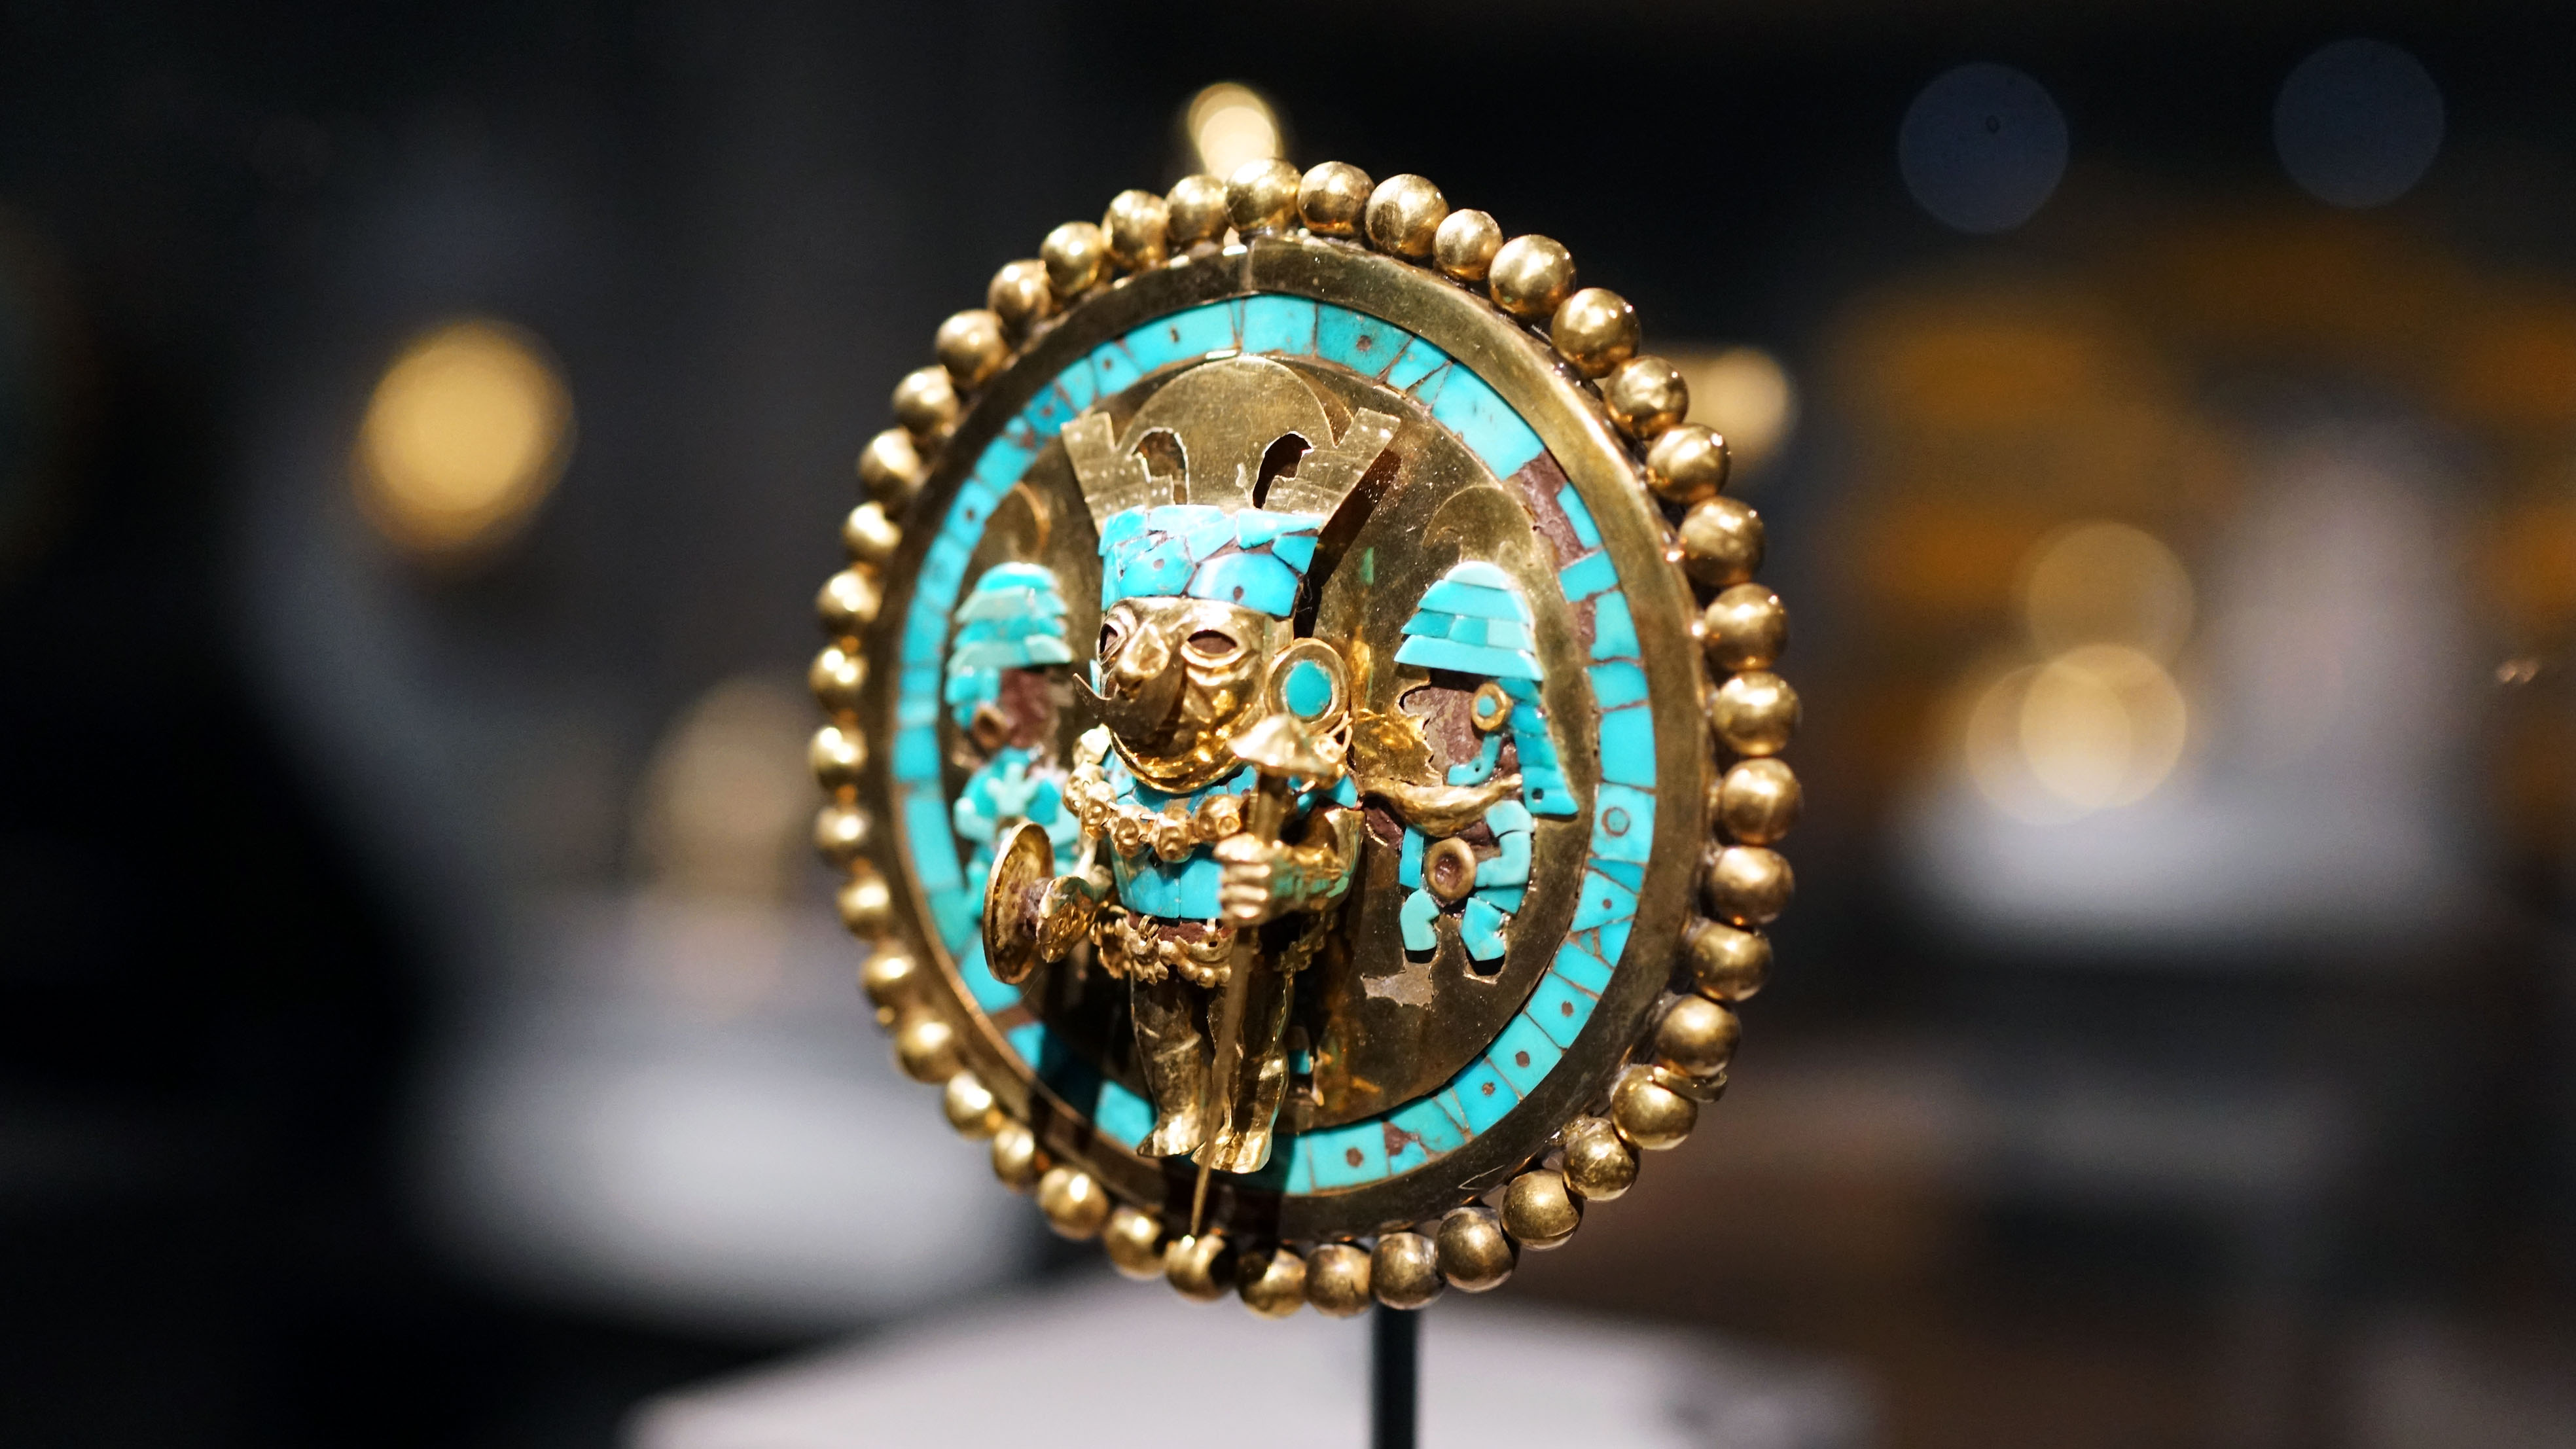
Ear spool depicting a warrior, c. 640–80 (Moche), gold, turquoise, wood (Museo Tumbas Reales de Sipán, Lambayeque, Peru)
The photo above was shot with a narrow depth of field to blur distractions in the background:
Camera: Sony RX1RM2 version 1 (full frame sensor)
Lens: 35mm f/2.0 (a pretty fast lens with a slightly wider angle than the human eye has)
Shutter speed: 1/160 second (a handheld photo shot slower than 1/30 or even 1/60 may be blurry)
F-stop: 2.5 (the aperture is close to its widest setting to create a soft blurred background.
Common problems
When shooting details, pay attention to shine (i.e. the varnish on a painting), reflections (especially from plexiglass or glass), and your own shadow. To correct for this, shoot from different angles: very high, very low, or from an extreme side angle. Even slight differences in angle can minimize reflections.
Sometimes there is no way to avoid a reflection or shine. Try to maneuver so it is as small as possible, and/or frame it against a broad field of color on the object so it’s easy to remove later in Photoshop.
When people are present, be aware of bright clothing and bags or backpacks with logos that are distracting.
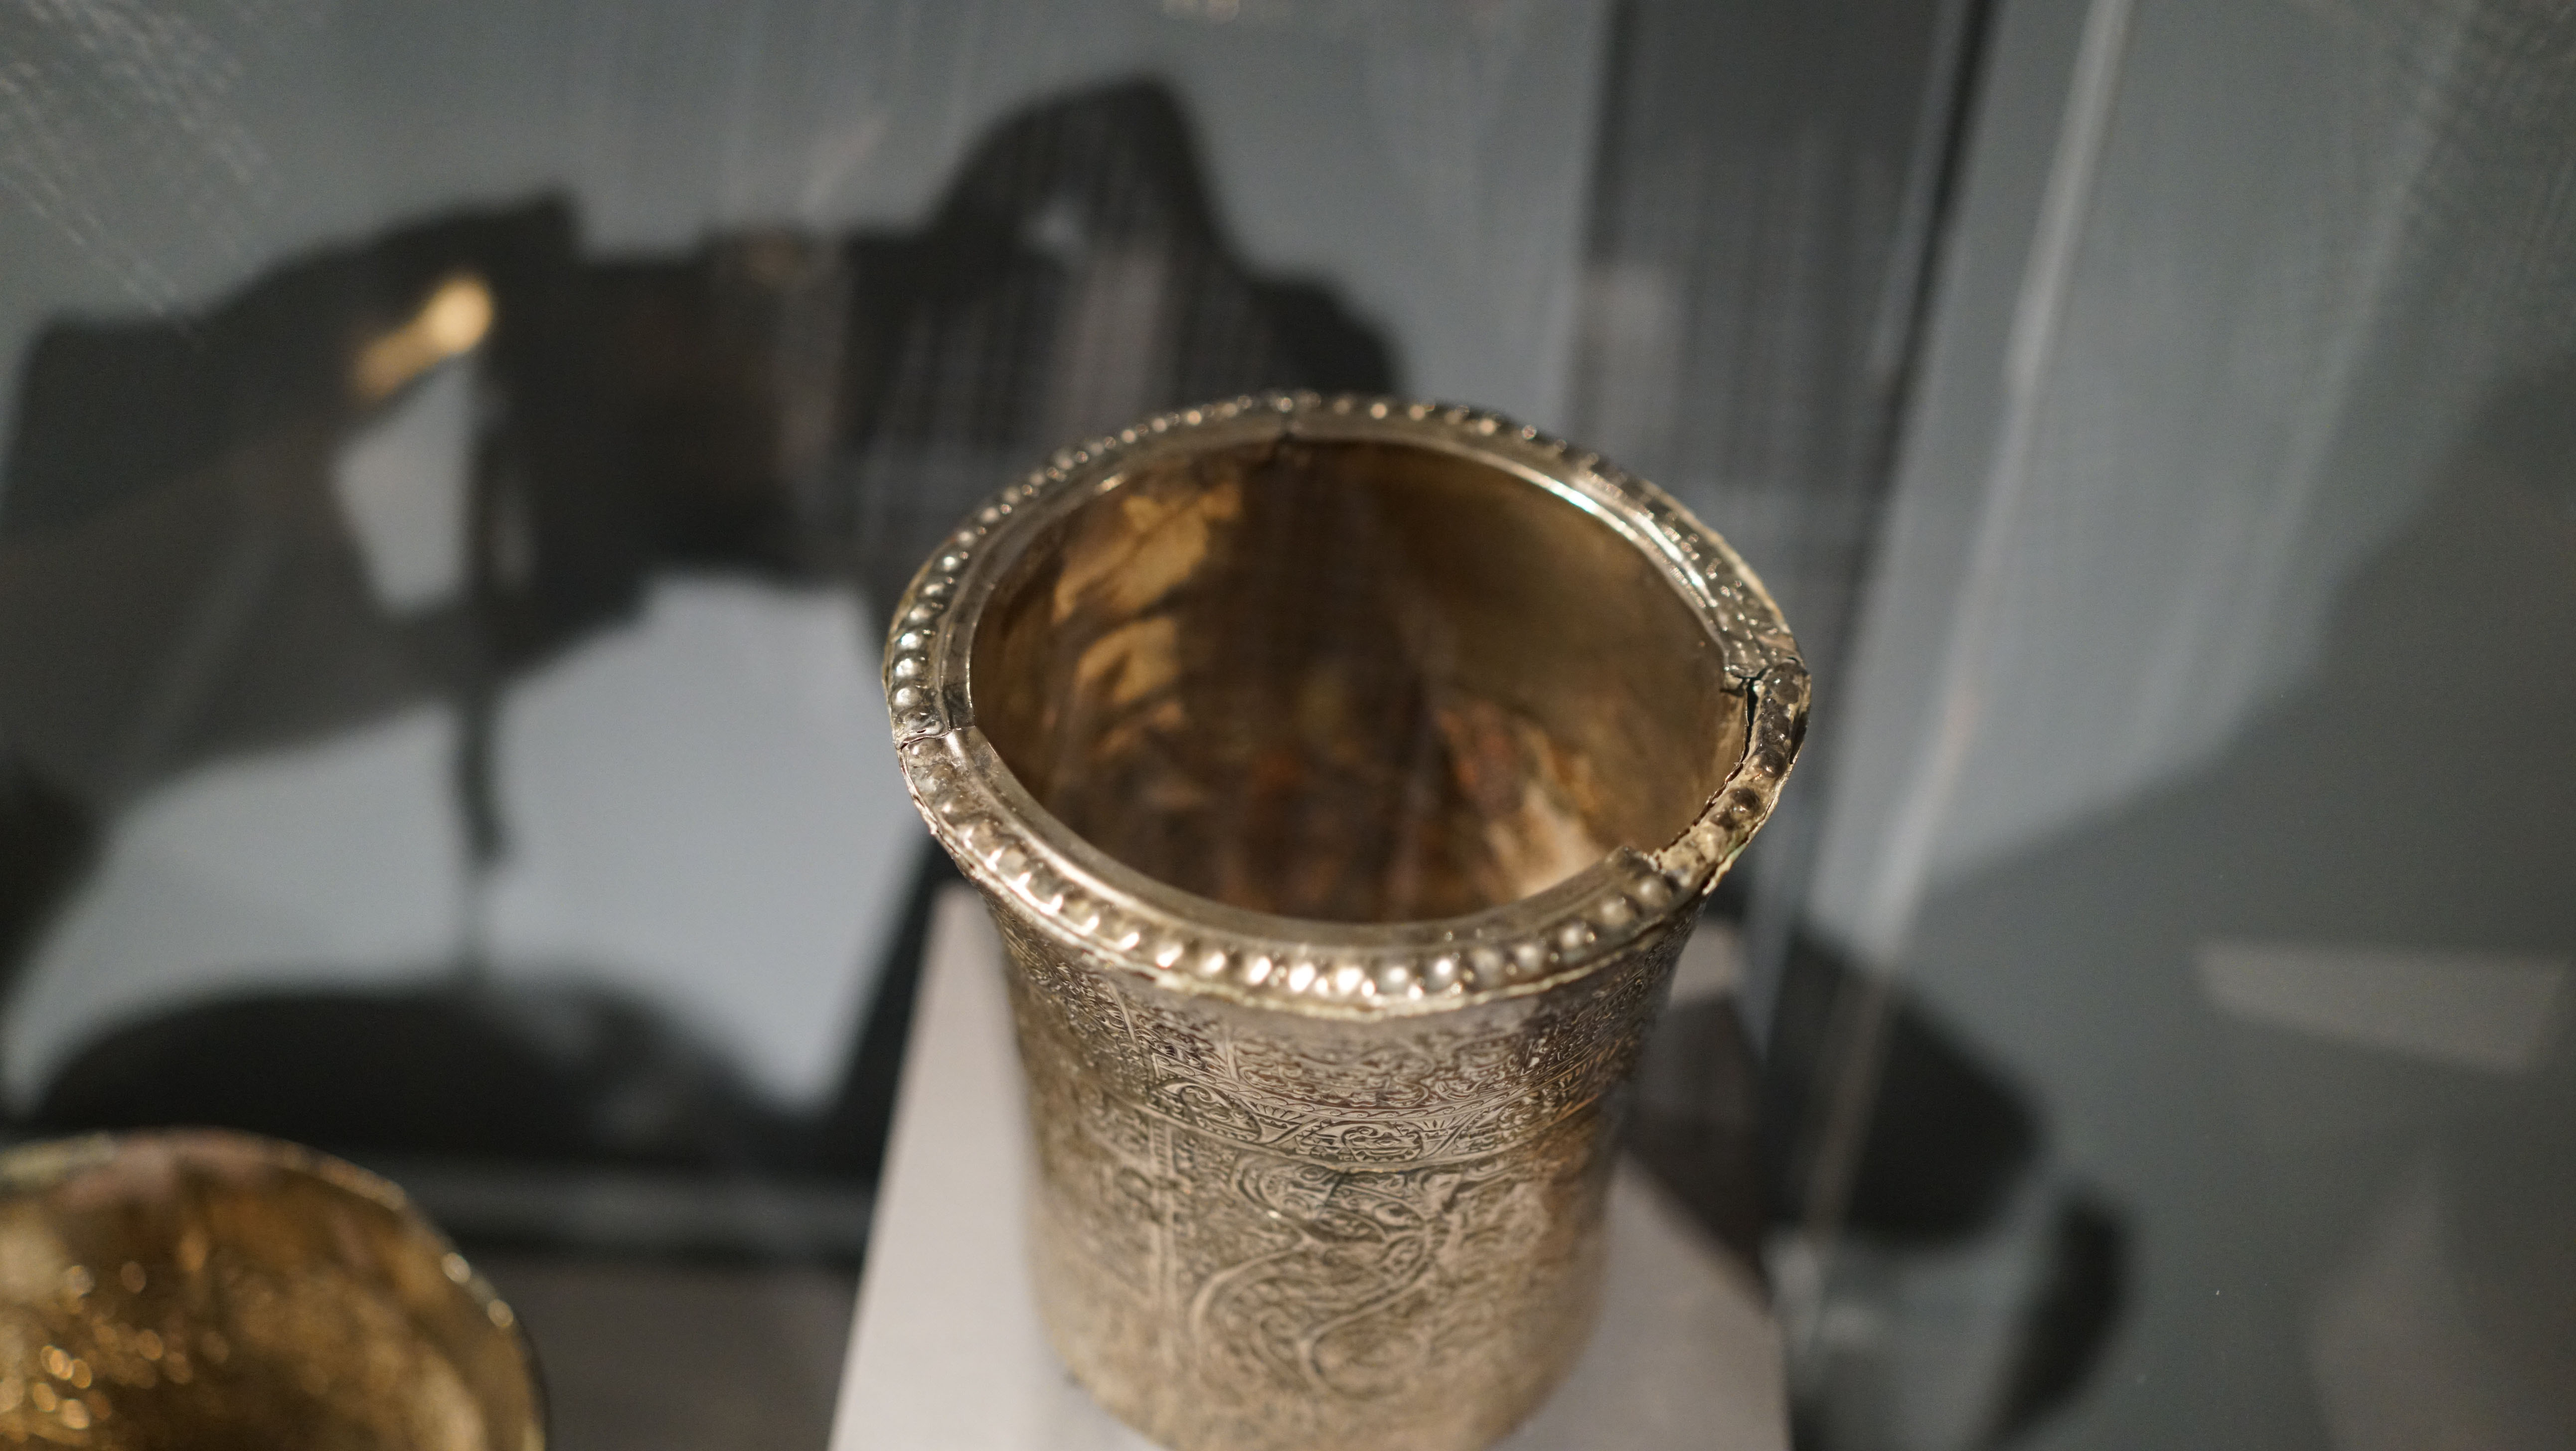
There are several problems with this shot:
• shadow of the camera, hands and arms are visible
• checkered shirt is reflected in the plexiglass bonnet (upper left and upper right)
• focus is soft
• the object is cropped at the bottom
More on cameras
Basic camera functions
Shutter speed: how long the shutter is open to received light. Faster speeds reduce blur but require more light.
Aperture (f-stop): how wide the lens opens. A wide open lens lets more light in and reduces depth of field (narrowing what is in focus).
ISO (ASA): sets the sensitivity of the light sensor. Low ISO requires more light and creates smooth photos; high ISO can create grainy images.
When a camera is set to automatic, it adjusts all three settings in relation to each other to create a well-exposed image. Auto settings are often quite good, but learning to control these settings manually can offer valuable benefits.
Basic sensor information
Digital cameras use an internal light sensor instead of light sensitive film to capture the image. In general, the bigger the light sensor, the better the photograph. This is especially true in museums since they are often dimly lit. The benefit of a small sensor is that it can fit in a compact camera.
Full Frame (35mm): mimics 35mm film cameras and provide the largest light sensor available before stepping up to a medium format camera.
Crop Factor (APS-C): about half the size of full frame, can take excellent photos
Four Thirds–1 inch: about one quarter to one sixth the size of full frame, used in high-end compacts, can produce beautiful shots in good light
2/3, 1/1.7, 1/2/5 and smaller: not recommended
Lens types
Prime lens: has a fixed focal length and can be faster (brighter) than a zoom
Zoom lens: has an adjustable focal length, is often slower (dimmer) than a prime
Telephoto lens: has a focal length longer than the human eye (more than 50mm)
Wide angle lens: has a focal length wider than the human eye (less than 50mm)
Macro lens: 1:1 magnification, the size of the object is the size it appears on the sensor
Fast lens: has a low f-stop number, f/1.4 for example (a fast lens that can let a lot of light in)
How to decipher a lens name
Here are some basics that will help you read a lens and and better understand what it does.
Example 1: Sony FE f/1.8 55mm ZA Zeiss Sonnar T* — here’s what that means,
Sony produces and markets the lens
FE is the code for lenses designed for Sony’s E-Mount full frame mirrorless cameras
F1.8 notes the lens’s widest possible aperture (fairly fast). The lens can close down to f/22
55mm a midrange focal length very close to what the human eye sees (neither wide nor telephoto)
ZA means the design was approved by Carl Zeiss, the legendary German optics company founded in 1846
Zeiss is simply more co-branding (the lens was made by Sony in Thailand)
Sonnar refers to a lens design developed in 1932 that reduces chromatic aberrations and flaring, and improves contrast
T* means the lens uses Zeiss’s trademark anti-reflective coating
Notes this is an amazingly sharp lens. It is small and light. It is an autofocus lens. It has 7 elements (pieces of glass) and 9 rounded aperture blades
Example 2: Zeiss Batis FE f/2.8 18mm Distagon T* — here’s what that means,
Carl Zeiss produces and markets the lens
Batis is the name for Zeiss’s line of lenses designed for Sony’s E-Mount full frame mirrorless cameras
FE is the code for lenses designed for Sony’s E-Mount full frame mirrorless cameras
F2.8 notes the lens’s widest possible aperture (not very fast). The lens can close down to f/22
18mm is a very wide angle focal length that captures much of the periphery
Distagon refers to a Zeiss lens design developed in 1953 that accommodates larger apertures but requires additional corrective elements to reduce distortion making the lens bigger and more expensive
T* means the lens uses Zeiss’s trademark anti-reflective coating
Notes this is an amazingly sharp lens with less distortion than is common in wide lenses. It is large but light. It is an autofocus lens. It has 11 elements (pieces of glass) and 10 aperture blades
Once you’ve shot your photos, you’re ready to edit them in Photoshop.