Watch this video version of this lesson, or see the same content presented through text and images below.
You can download the raw audio file used in this tutorial, as well as our final, edited version.
If you do not have access to GarageBand, see our tutorial on editing audio with Audacity.
Jump to
- Setting up a new project
- Importing an audio file
- The edit panes
- Turning off the music settings
- Using the playhead
Before you begin
You will need to be using an Apple computer with GarageBand installed.
Make sure you’re using the latest version of GarageBand. You can update it for free through the Apple App Store.
Setting up a new project
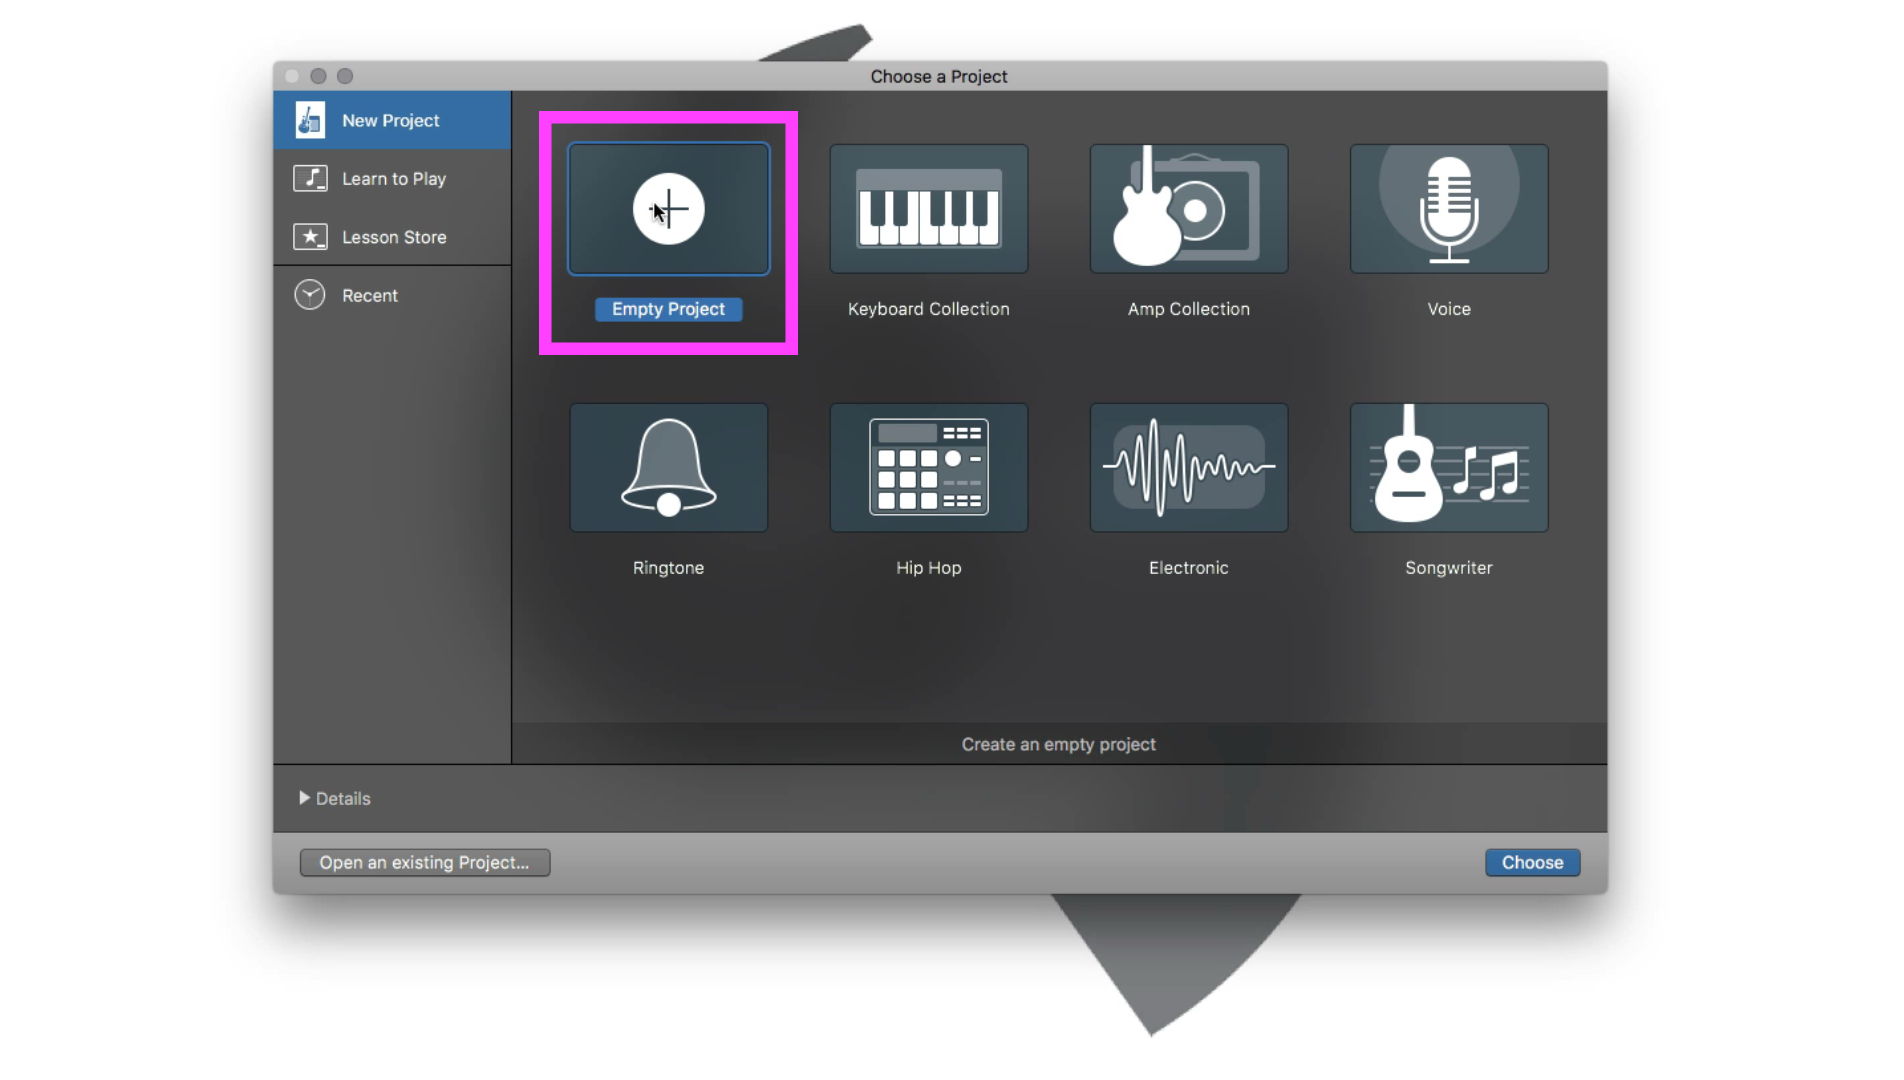 From the GarageBand start pane, choose “Empty Project.”
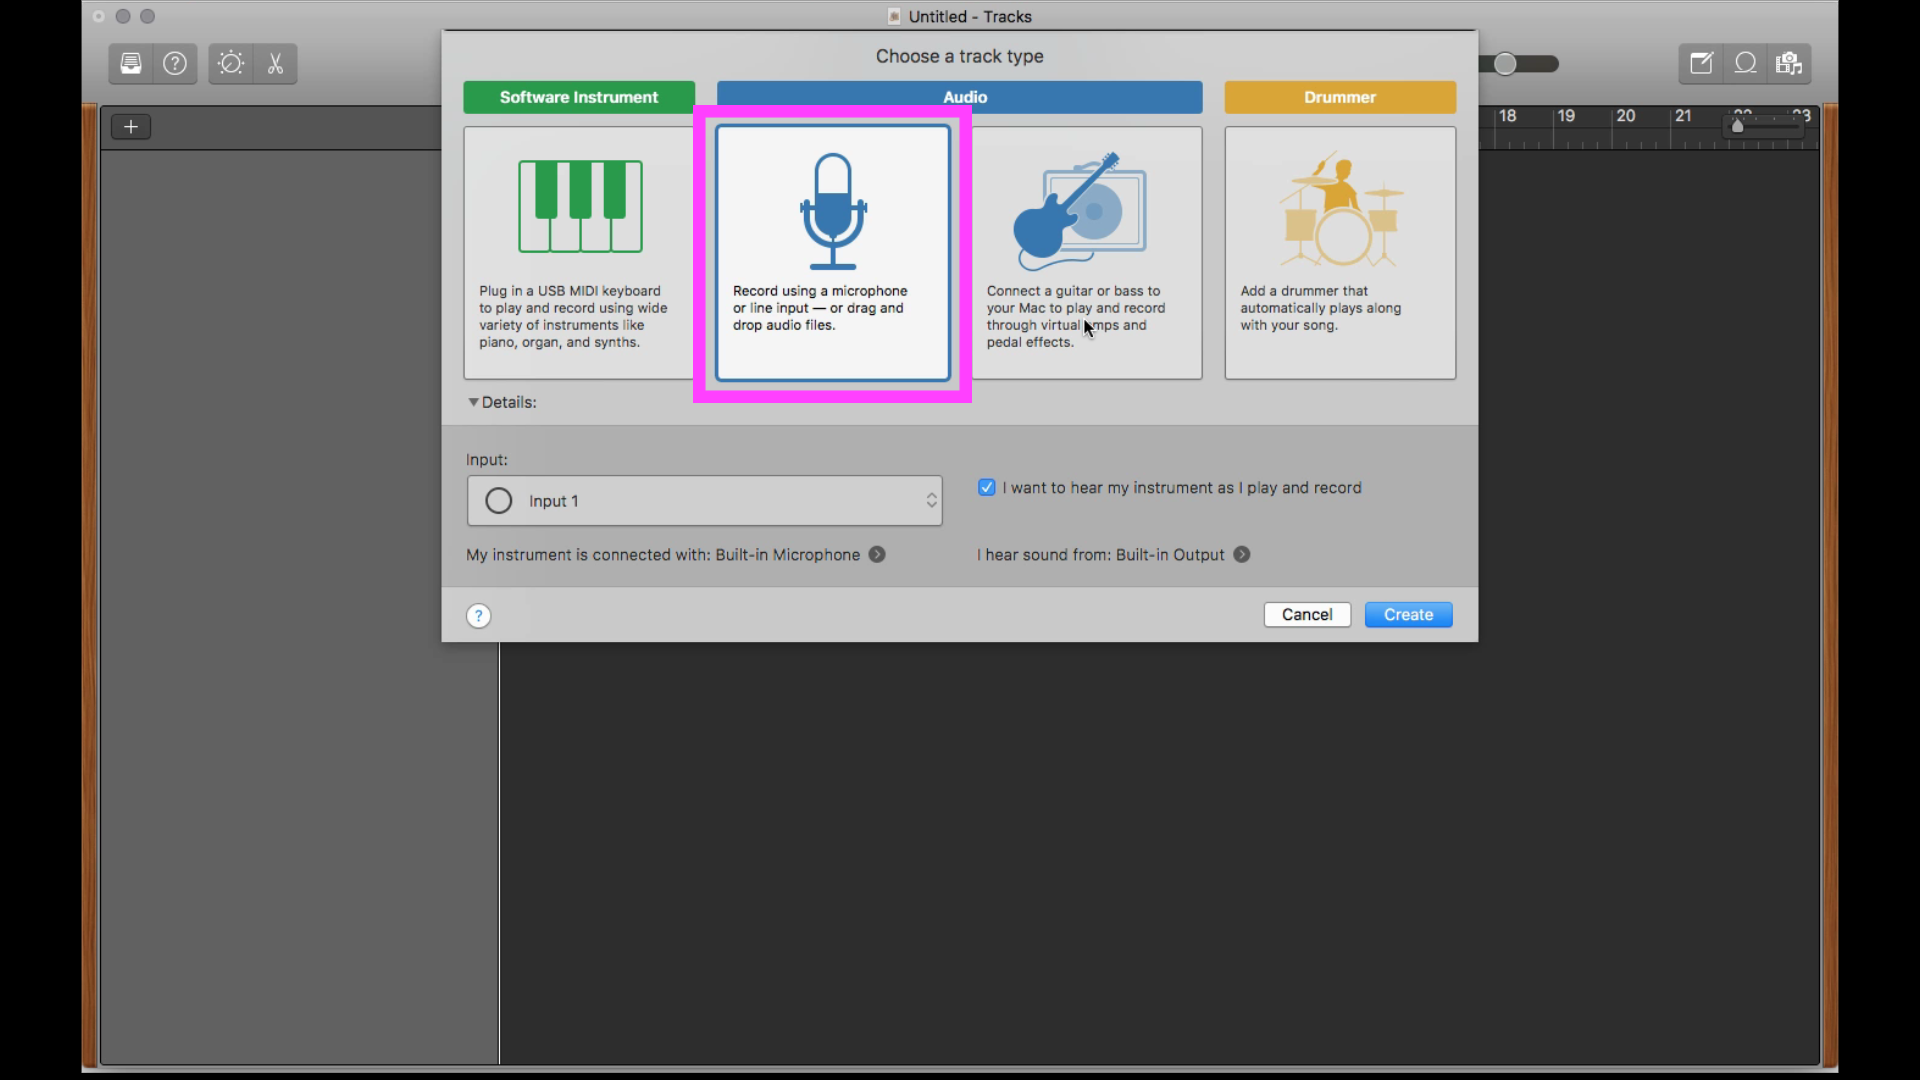
GarageBand will ask you to choose a track type. Choose the option with the picture of a microphone.
Importing an audio file
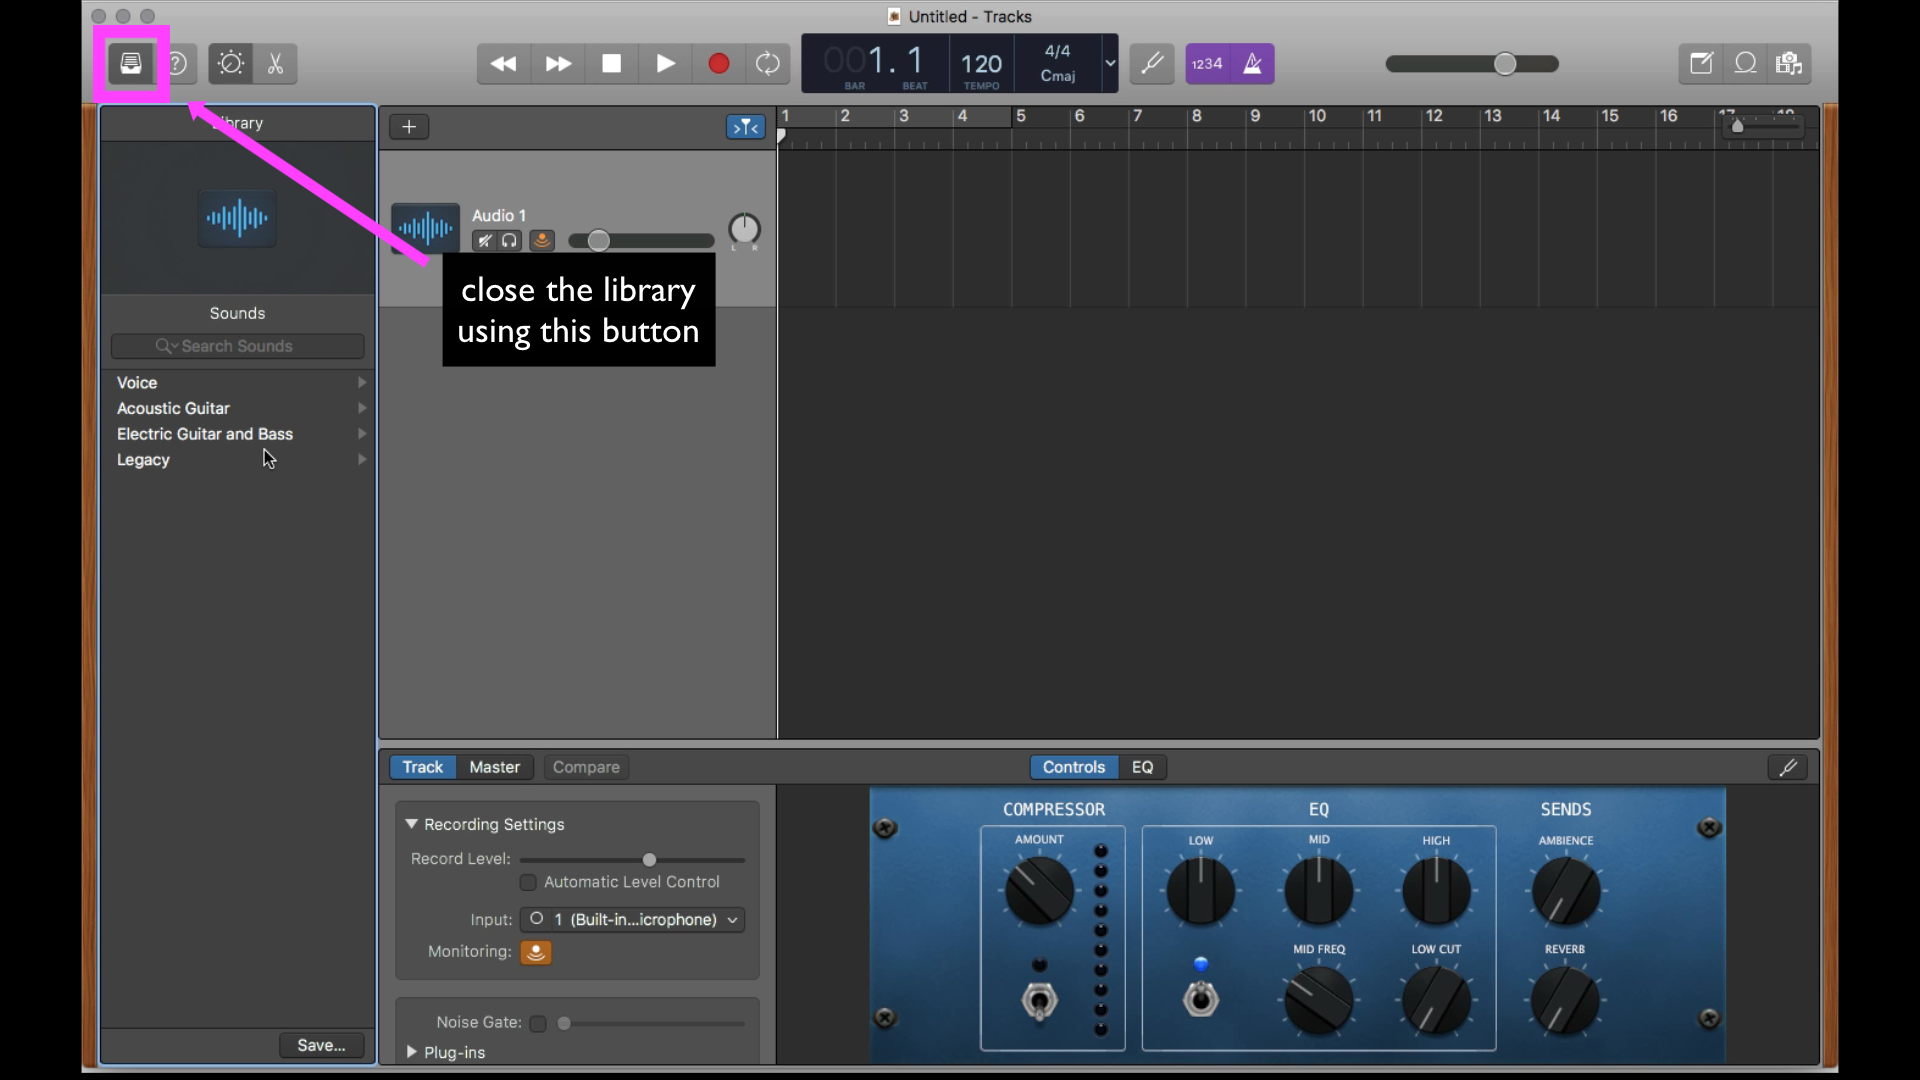
First, close the Library by clicking the button on the upper left. (You can import files using the Library, but it’s much easier with the Finder.)
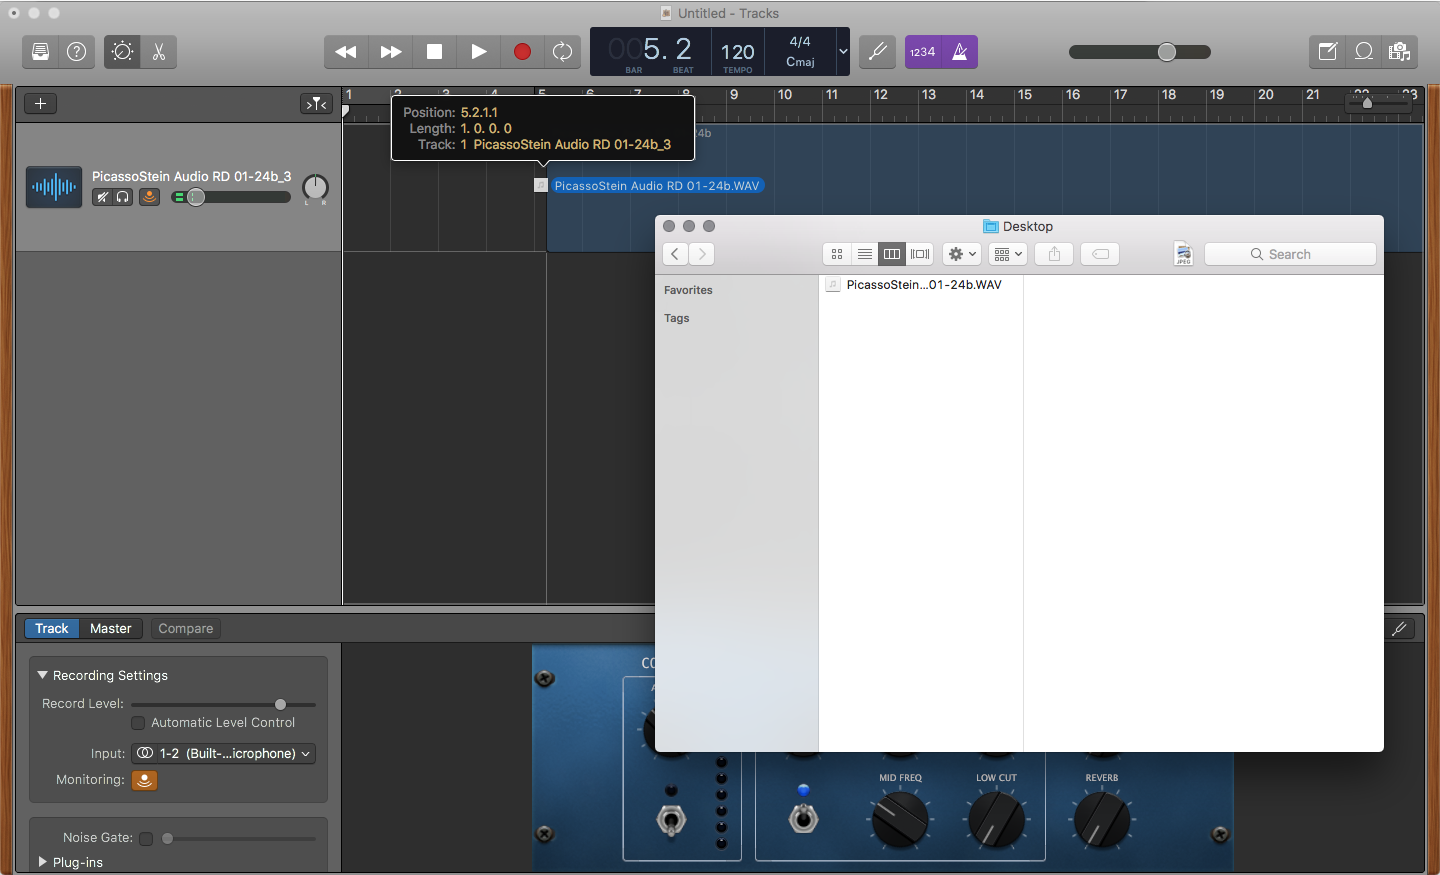
Then, simply drag and drop your raw audio file from the Finder into GarageBand.
The edit panes

Now you will see your audio file displayed as a bar along the top pane of GarageBand. Double-click this, and your track will also appear in the bottom pane.
Tip: you can adjust the size of these panes by grabbing and moving the divider.

The top pane displays a macro, or zoomed-out, view of the audio file. The bottom pane displays a micro, or zoomed-in, view. You will be able to cut and move pieces of the audio in either pane. We use the bottom pane to make most of our edits, but you can also use the top pane to make larger-scale edits and move bigger pieces around.
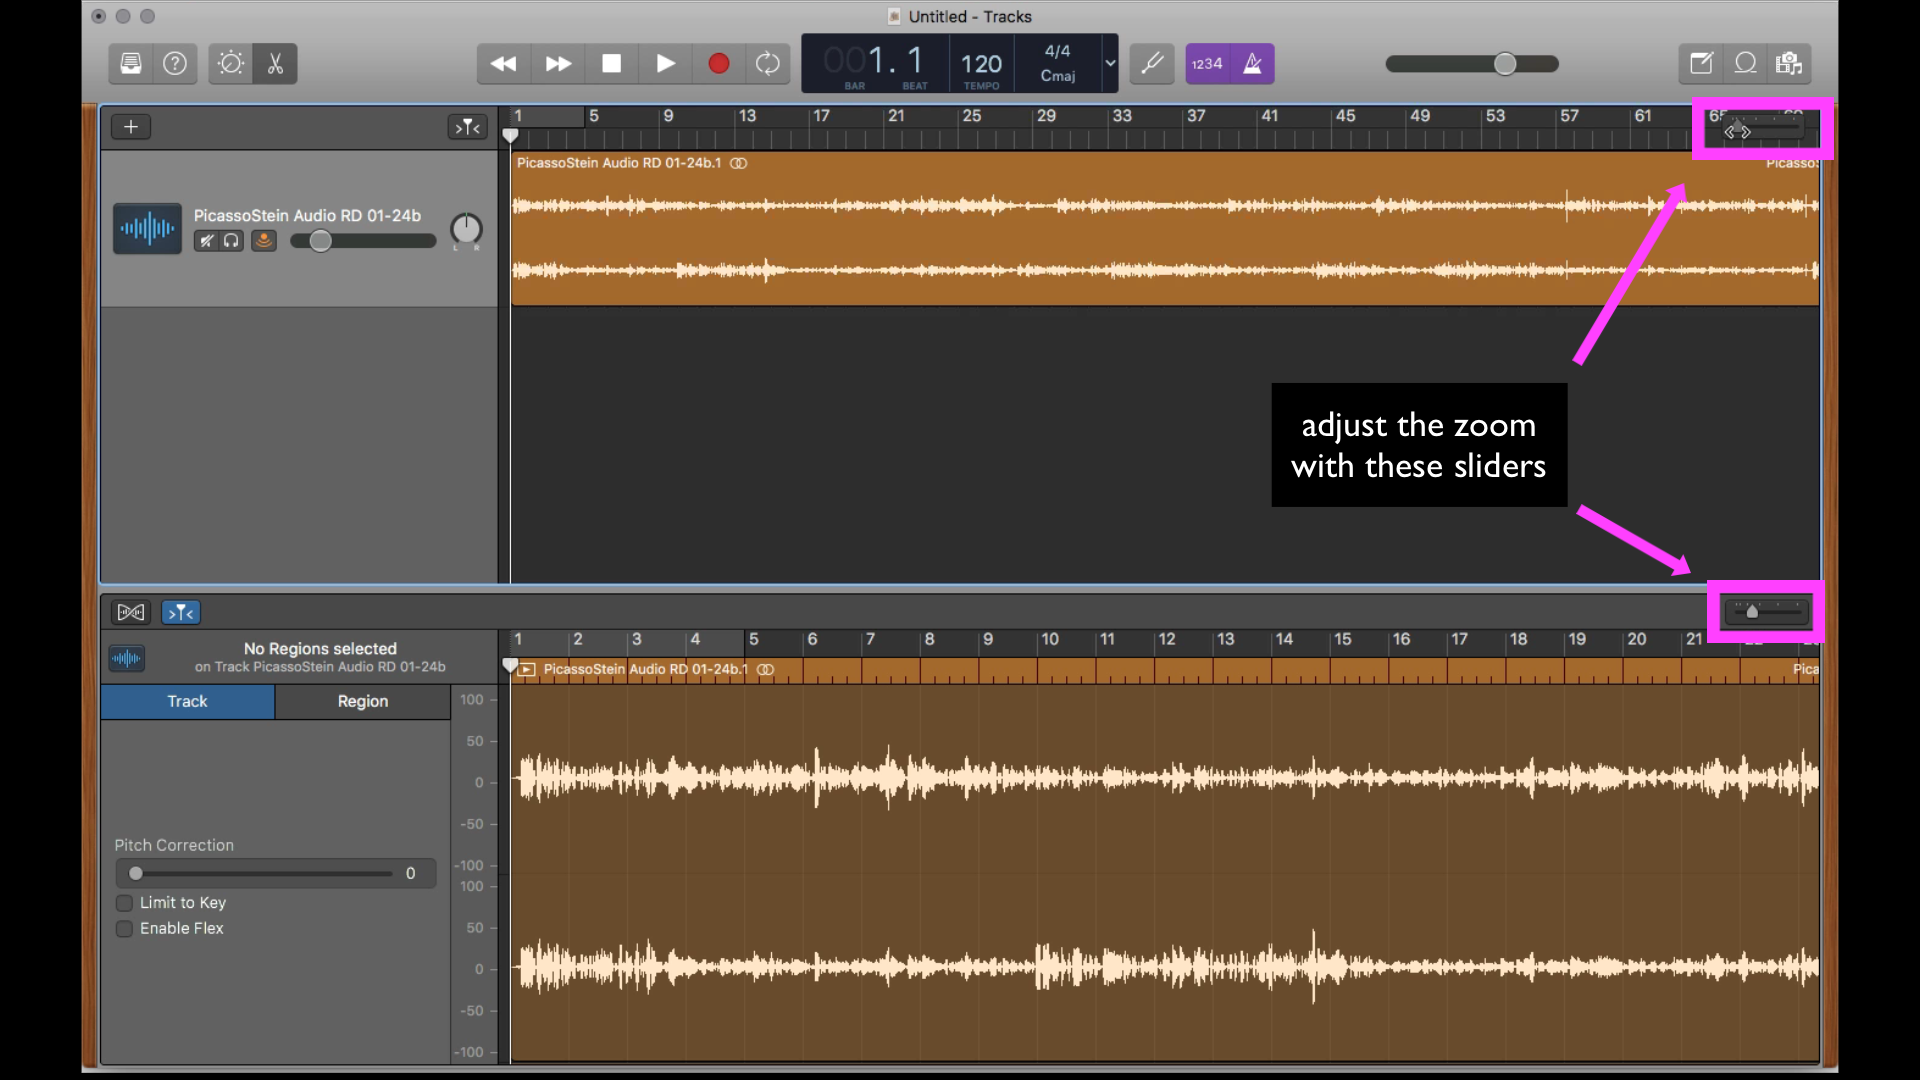
You can adjust either of these views with the zoom sliders on the upper right hand side of each pane.
Tip: adjust the bottom pane so that you can easily see details in the sound signature. You’ll use this pane to make the precise edits needed for these audio files.
Turning off the music settings
GarageBand’s default settings are for music, so you need to change the display settings so that they are right for editing a conversation.
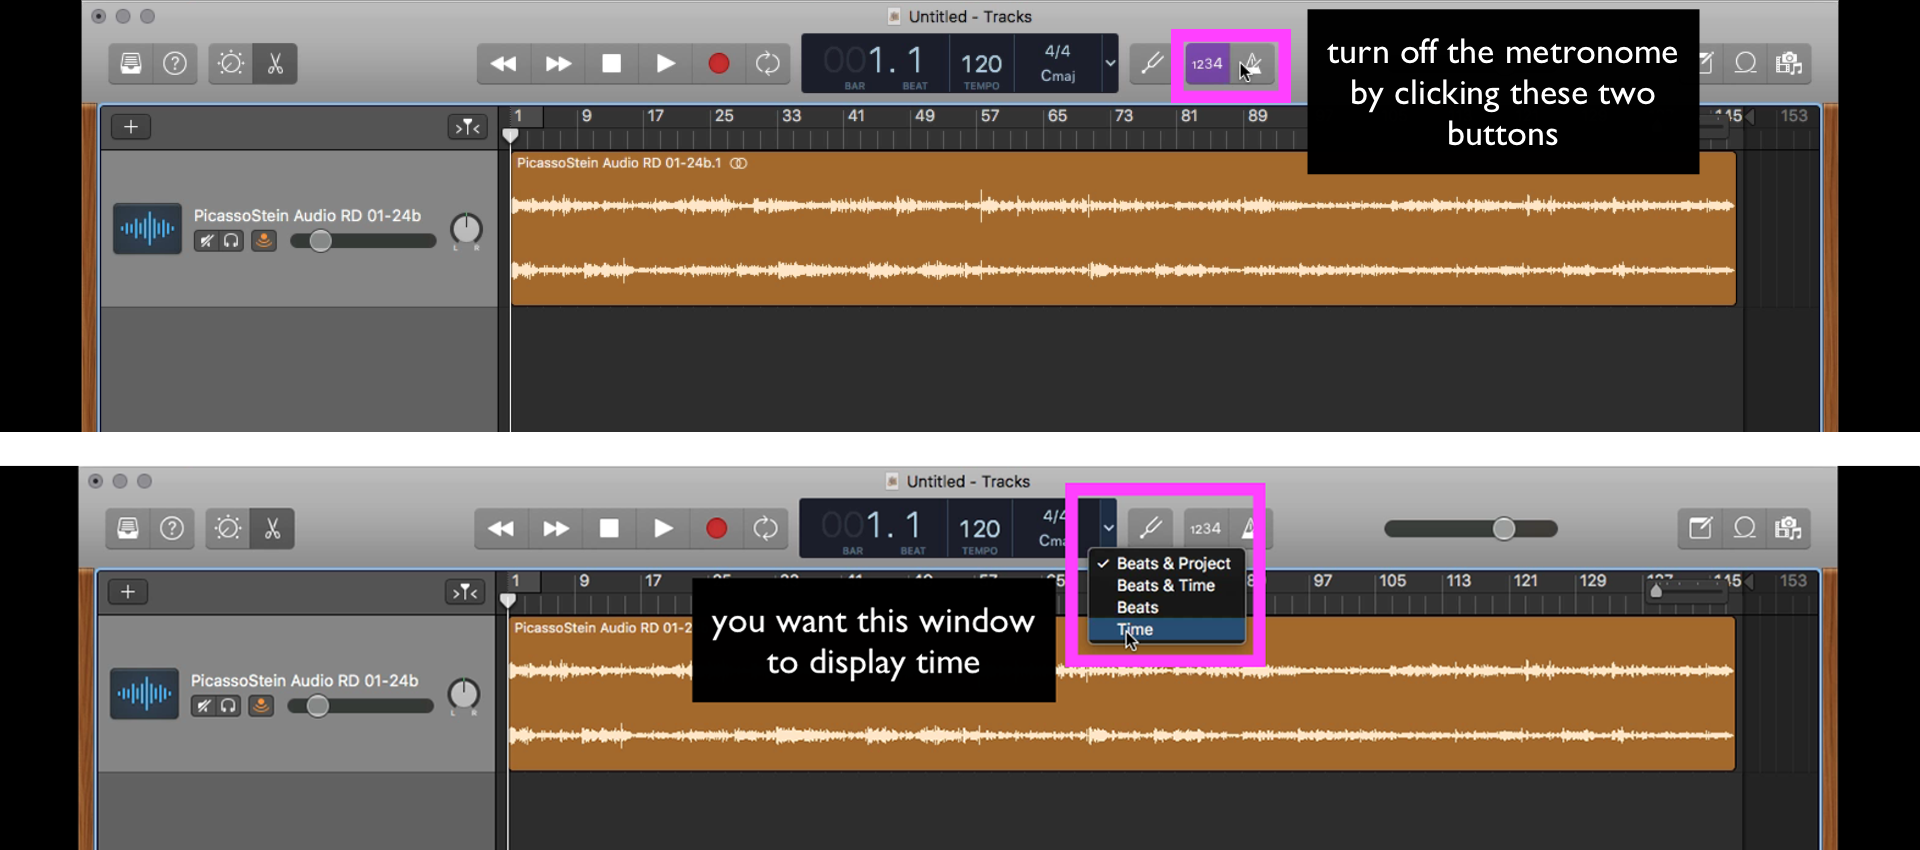
Change these by turning off the metronome (top image), and changing the display measurement from tempo to time (bottom image).
Using the playhead
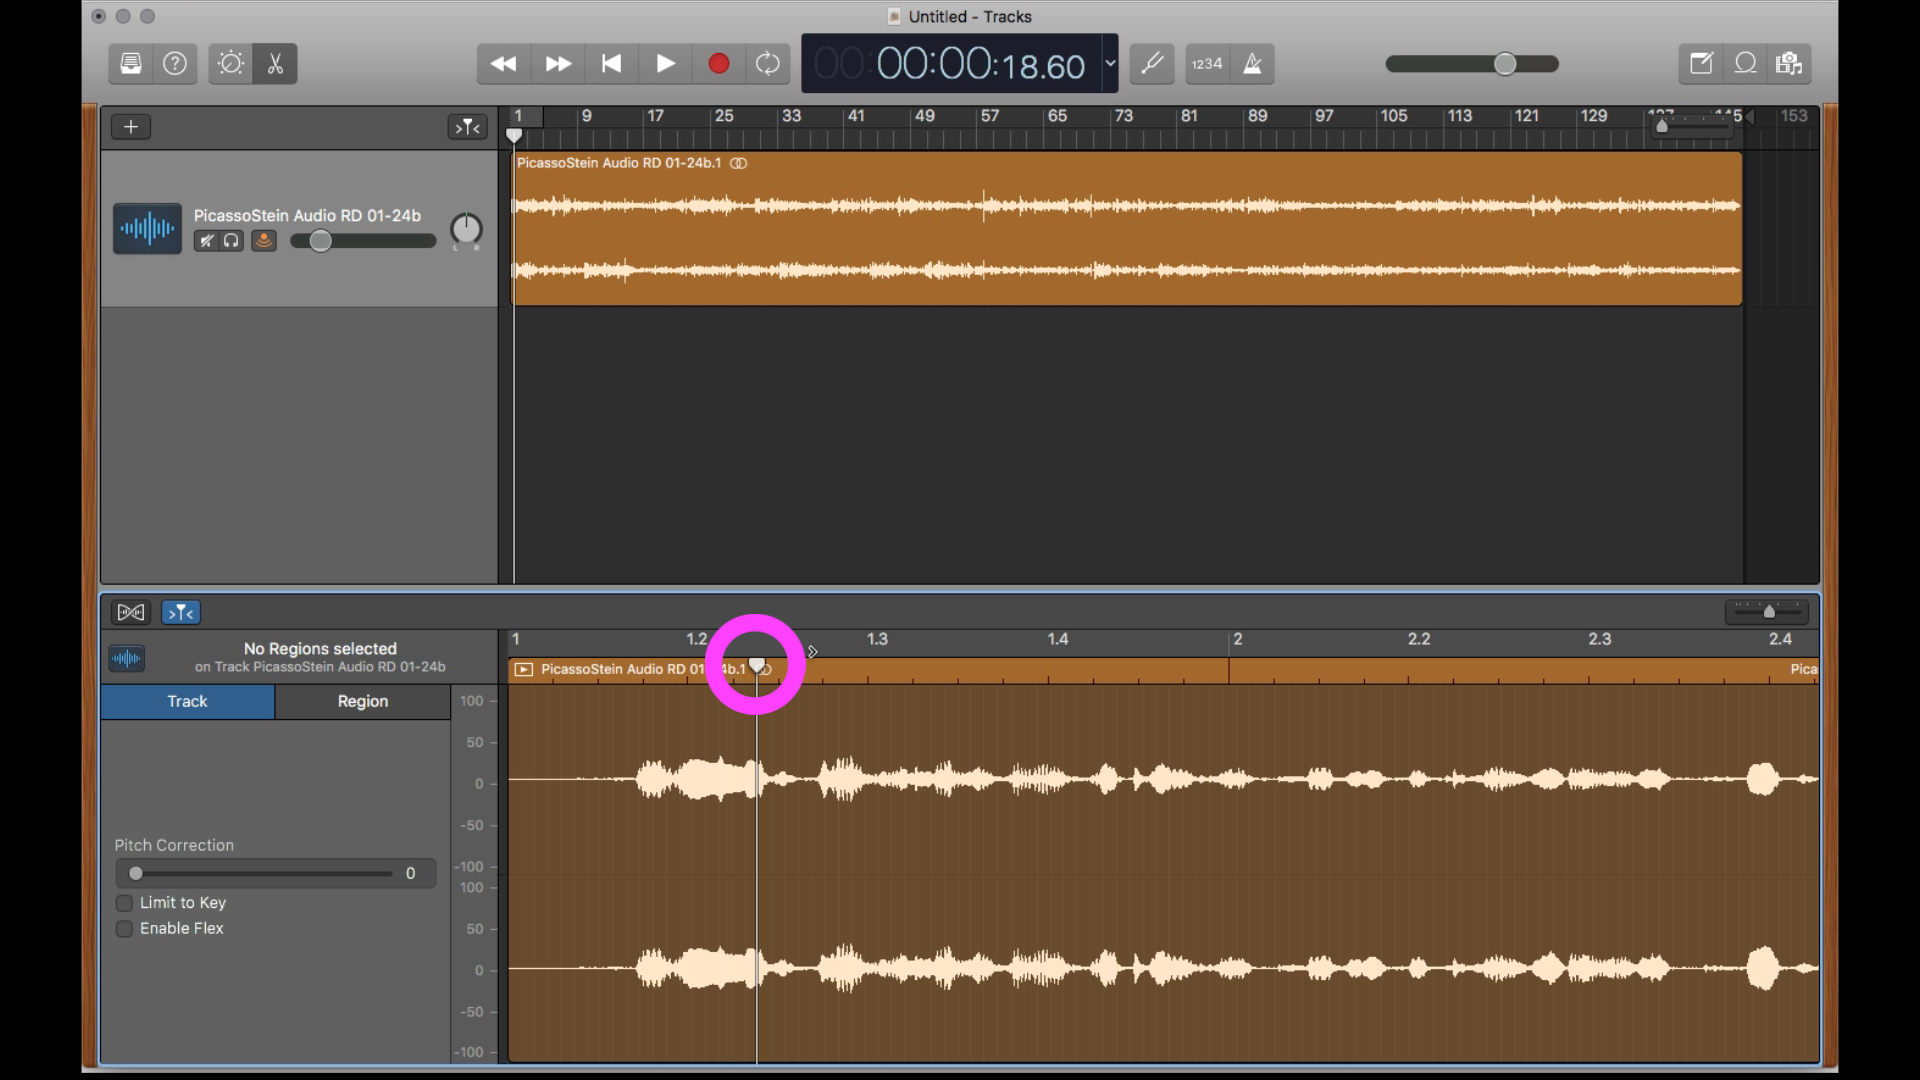
Along with the upper and lower panes and the zoom sliders, the playhead is the main way you’ll navigate around your audio file. Grab it by the upside-down triangle at the top to move it around. You can move the playhead in either pane at any time.
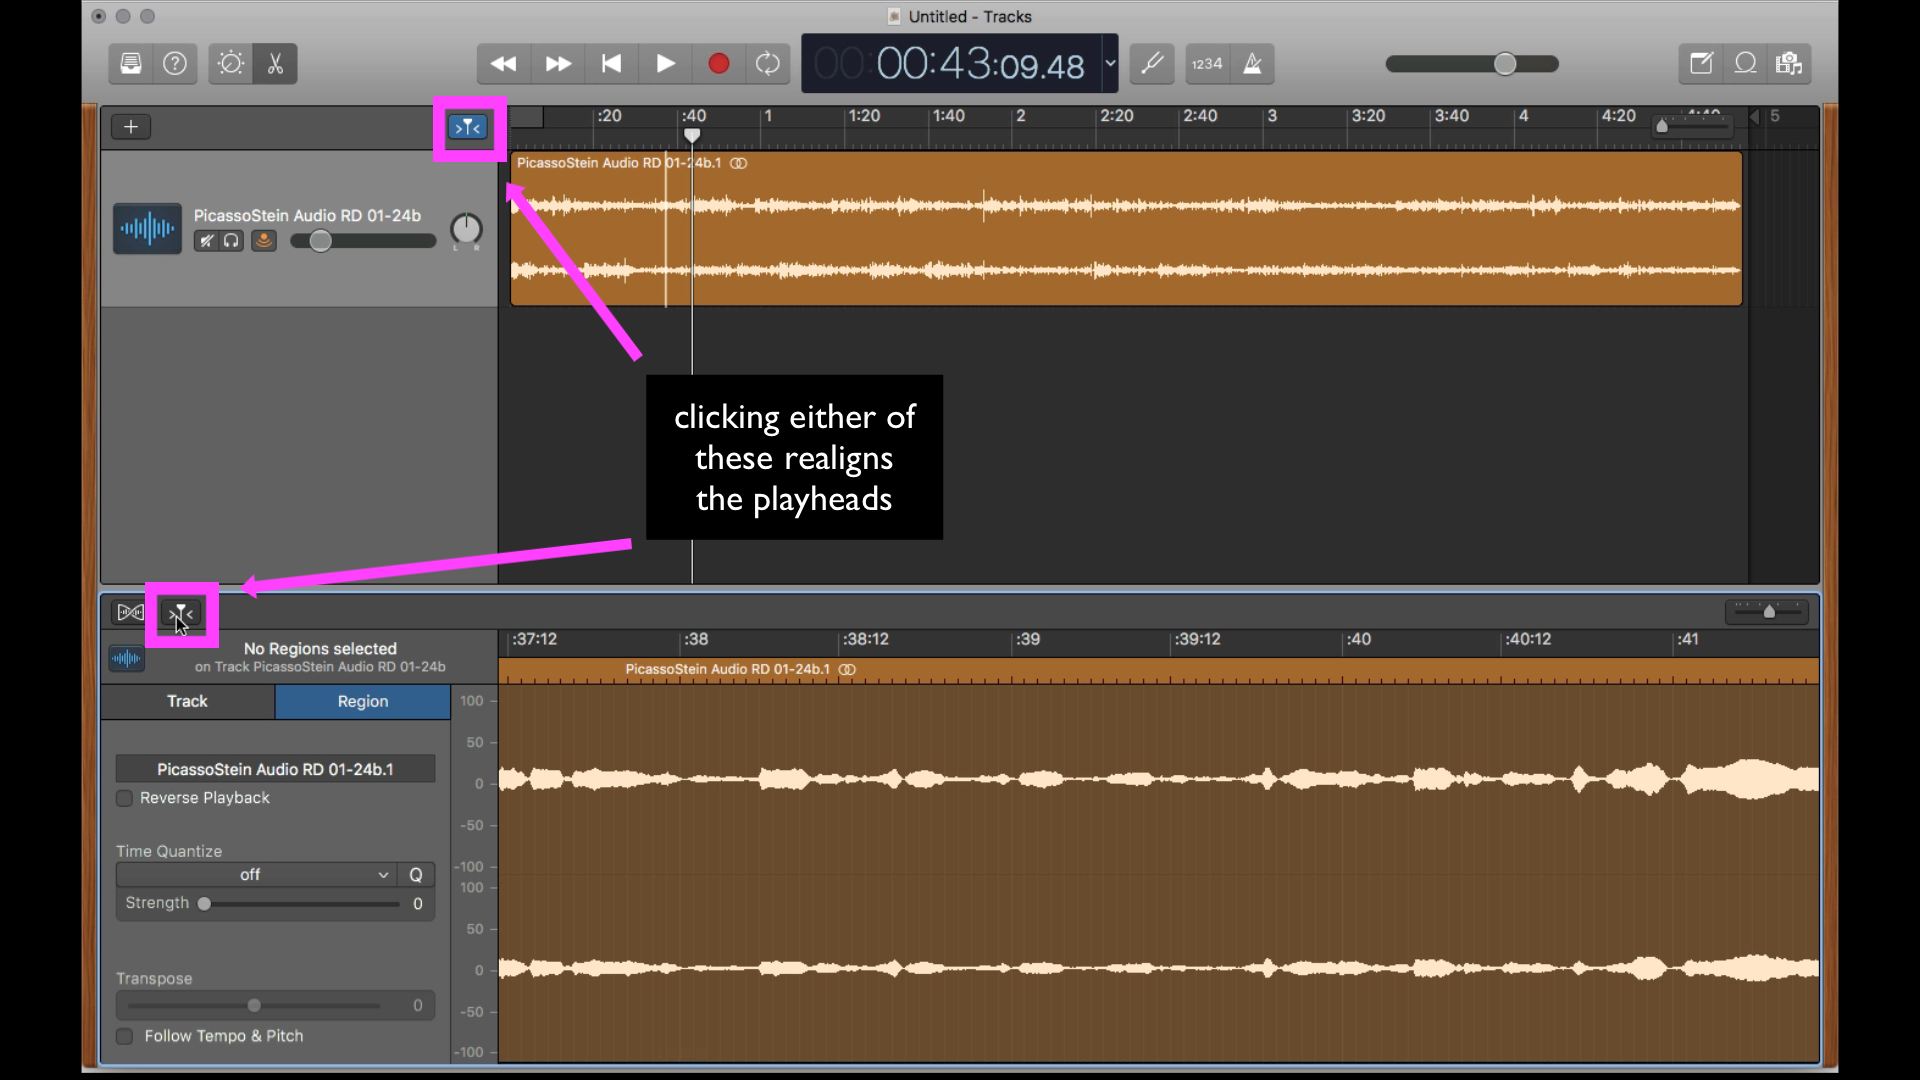
Sometimes while you’re playing through a file, your playhead may move off of the screen on one or both of the panes. If this happens, use the “catch playhead” button on the left to bring it back into view.
Now you’re ready to start cutting your audio, which is covered in the next lesson.
[0:00] [music]
Dr. Beth Harris: [0:05] Today we’re sitting in front of my computer.
Dr. Naraelle Hohensee: [0:08] We’re looking at how to edit an audio file with GarageBand.
Dr. Harris: [0:12] I’ve opened up GarageBand and I’m going to choose Empty Project.
Dr. Hohensee: [0:17] We already have our raw audio file that we’ve recorded at the museum.
Dr. Harris: [0:21] What we want to do is bring that raw audio file into GarageBand so we can edit it. I get prompted about what kind of track I want to use, and I’m going to choose this one with a picture of a microphone.
[0:32] The first thing I’m going to do is close the library, and then, from the finder, drag that audio file in and up.
Dr. Hohensee: [0:40] This feels like a lot to look at.
Dr. Harris: [0:41] This is a lot going on when you first see it. The top is the audio track itself. Double click on this top track, and that made the same track appear here at the bottom. What we’re seeing is the actual sound signature.
Dr. Hohensee: [0:54] It’s a little confusing, because you’re seeing the same thing both above and below. GarageBand is configured so that we can have a macro view, and on the bottom, a more micro view where we can fine tune things.
Dr. Harris: [1:08] Since we want to look at them differently, we can expand them or contract them. I’m going to use this slider here. That gives me a sense of the sound signature, the detail, the fineness of it, and I can easily make edits.
Dr. Hohensee: [1:21] And then there are a couple other settings we need to change, just to make things easier for ourselves.
Dr. Harris: [1:25] This is set up for someone recording some music, so we need to turn off the metronome. And we need to change this from keeping track of the tempo to keeping track of time.
Dr. Hohensee: [1:38] Those zoom sliders and the top window and bottom window are going to be the key ways that you’re going to navigate around your audio files you’re editing.
Dr. Harris: [1:45] Yes, that plus one more thing, and that’s the playhead. I grab it right on this top portion here, and as I do this, you can see the playhead moving on both the top and bottom tracks.
Dr. Hohensee: [1:57] Every once in a while, your playhead may get lost. It may go off the screen, especially on the bottom portion, and there’s a button you can click to bring it back on-screen so that your clips are aligned visually and you can see what you’re doing. Now we’re ready to get started with our editing, and we’ll look at that in our next video.
[2:14] [music]