Watch this video version of this lesson, or see the same content presented through text and images below.
You can download the raw audio file used in this tutorial, as well as our final, edited version.
Jump to
- The editing process
- Listening for edits
- Using your cursor
- Selecting, cutting, and moving audio
- Using the undo function
- Adjusting volume
- Exporting your edited file
Before you begin
Once you import the raw audio, make sure to save your Garage Band file and give it a name.
Our editing process
At Smarthistory, we dive right in and edit as we listen to our audio the first time through. We usually do at least three rounds of editing (most often it’s 4-6).
On round 1, we…
- edit for general content by cutting out fragments of sentences or places where we misspoke
- cut out extraneous words—“um,” “uh,” or words like “actually” or “in fact”—as well as breaths and pauses
On round 2, we…
- tighten things up more, catching places where we missed small words or breaths on the first round
- create a coherent story by deleting larger sections—we may decide, for instance, that a particular tangent or detail is not worth including
- in rare cases, we may move something around so that it makes more sense
Tip: Because Smarthistory is based on a conversational approach, we try to keep the edited audio as true as we can to the flow of the original conversation. We only move big pieces around if absolutely necessary.
On the final rounds, we…
- give the audio a final polish, make small adjustments and then export the file (as a .wav or .mp3) — using the highest quality settings
Getting started: listening for edits
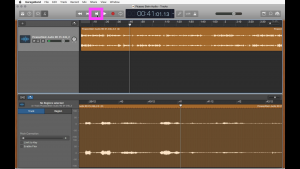
Begin by using the rewind button to return the playhead to the beginning of the audio. Then hit “play” (we recommend you use the spacebar, which both starts and stops the playhead).
Listen for your first edit.
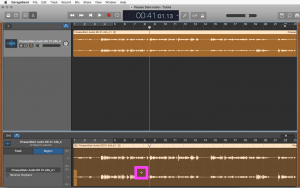
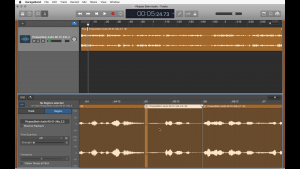
When you find something that you want to cut out, stop and listen to that section again, and notice how that section looks in the waveform display (sound signature) so that you can select it.
Using your cursor
When you move the cursor into the lower half of the lower audio pane, it turns into a crosshair shape. You use the crosshairs to select the parts of the audio you want to edit by clicking and dragging in that pane.
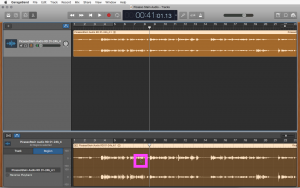
When you move cursor into the upper half of the lower audio pane, it turns into an arrow (the standard shape of your cursor). You will use the arrow to separate and move the parts of the audio you have selected.
Selecting, cutting, and moving audio
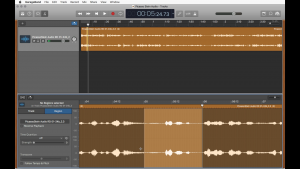
Using the crosshairs to click and drag, select the portion of the audio that you want to delete or move.
Tip: if you hit “play” (the spacebar) after you’ve made a selection, Garageband will play only the portion of audio that you’ve selected. This is an easy way to check that you have selected the right thing.
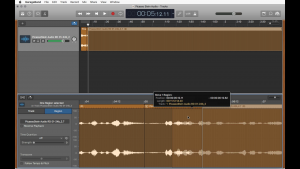
You can turn your selection into its own “region” (an independent, movable section of audio) by clicking once on the selection with the arrow cursor.
Tip: if you know you want to delete your selection, you don’t have to make it a separate region first. You can simply hit “delete” on your keyboard, and that portion of the audio will disappear.
Tip: edit carefully! It’s easy to cut off the beginning or end of words, so once you’ve made the edit, go back and check before moving on.
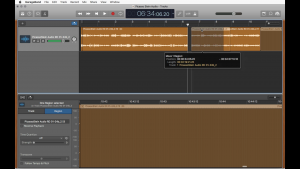
You can now use your arrow cursor to drag the audio you want to keep so that it is contiguous with the preceding audio. If you want, you can simply drag it over the section of audio that you want to get rid of—dragging one region over another will overwrite what’s there.
You may want to zoom in (using the bottom slider) to finely align the clips.
Tip: selecting Edit→Alignment Guides turns on the “snap” function that will help you make your regions contiguous as you edit.
Selecting and cutting out parts of an audio region can only be done on the lower pane. But you can move regions around on either pane. The upper (“macro”) audio pane is useful for moving larger regions around—for instance, if you decide to move one section of the discussion to a different place in the audio (but remember to do this sparingly).
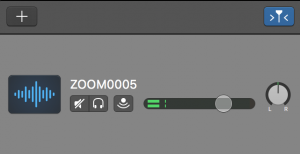
Sometimes you may want to save a clip you have isolated, to use in another location later. To do that, choose track→new track with duplicate settings and then, on the upper pane, drag that clip into the new track and turn off the audio by clicking the mute icon (see below—it’s the speaker with the line through it).
Using the undo function
If you make a mistake, you can easily undo it with command + Z (or by selecting Edit→Undo). GarageBand allows multiple undos, unless you have recently saved the file. Saving the file takes away your ability to undo the last action.
Tip: GarageBand autosaves frequently, and this does not interfere with the undo function. You may want to only save the file manually at strategic moments when you know you don’t need to undo any mistakes.
Adjusting volume
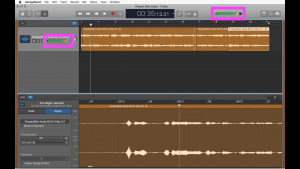
Before you export your edited audio file, you may want to boost the volume, or “level,” of your audio. You can do this by moving the slider to the left of the track, and you can also adjust the universal output level at the top of the window.
Tip: as you watch the audio meters (the moving color bars outlined in pink above) a good rule of thumb is to try to have the loudest parts of the recording reach into the orange-colored areas, or, every once in a while, into the red.
Exporting your edited file
When you are done editing, select Share→Export Song to Disk. You’ll be given the option to choose where and under what name to save the resulting file. Exporting creates a whole new audio file that reflects your edits. You can use this exported file in your video.
If you want to change something about your edit, you can always do so in this saved GarageBand project, and then re-export a new file.
[0:00] [music]
Dr. Naraelle Hohensee: [0:05] We’re sitting here at the computer, and we’re looking at how to edit using GarageBand. We’ve already set up our project, but we want to do one more thing before we start editing, and that’s save our file and give it a name.
[0:19] We should start by talking about what we mean by editing.
Dr. Beth Harris: [0:22] We want to make the video as tight and compelling in its story as possible. I cut as I listen the very first time because I do several rounds of audio editing. What I do the first time is I get rid of everything obvious. I get rid of the “ums” or breaths.
[0:37] Then, on the second round, I’ll tighten it up even more, because by then I’ll have a sense of the story. I may realize there’s a whole passage that we don’t want to get into and I’ll get rid of those big areas. I may even move something around.
[0:53] On the third pass, I’ll usually do some more fine-tuning.
Dr. Hohensee: [0:57] Because Smarthistory has a conversational style, we don’t usually move big chunks of things around. We try to keep the conversation as natural as possible. Now we’re ready to dig in.
Dr. Harris: [1:08] Now I’m going to click here to go back to the very beginning of the audio, and hit the space bar to play.
[1:14] [prerecorded audio begins]
[0:00]
“[1:14] We’re at the Metropolitan Museum of Art, looking at Pablo Picasso’s ‘Portrait of Gertrude Stein.’ This dates…This is an early painting…”
Dr. Harris: [1:20] Steven said “This dates” and then decided to say “This is an early painting” instead. I’m going to get rid of “This dates.” I’m going to go back here, put my playhead here, a little bit back in time, and hit the space bar to hit play again.
[1:33] [prerecorded audio begins]
[0:00]
“…[1:33] of Gertrude Stein. This dates…This is an…”
Dr. Harris: [1:36] This section here is the words “This dates.” This little bump here is Steven’s breath just before he says “This dates.” I want to take that little breath too.
[1:48] The most important thing to notice is the different things I can do with my cursor. You’ll notice that when I put my cursor down here on this bottom part of the sound signature, it turns into a cross shape. When I bring it up here, it turns into an arrow.
Dr. Hohensee: [2:03] We use the crosshairs for selecting parts of the audio that we want to edit, and we use the arrow to move those parts around. You’ve selected the audio that you want to delete.
Dr. Harris: [2:12] Now I want to cut it out. To do that, I’m going to, not have it a cross shape anymore, but I’m going to make it an arrow. I’m going to click once. You can see that this is now a separate section. I can either delete it, or I can drag.
Dr. Hohensee: [2:27] Dragging a clip will overwrite whatever is under it. We can also use the top pane, where we’re more zoomed out, to make larger-scale edits where we move big chunks of the audio around and rearrange them if necessary.
Dr. Harris: [2:39] If you ever make a mistake, you can always hit Command Z. You can hit Command Z as many times as you want, as long as you haven’t saved.
Dr. Hohensee: [2:47] One last adjustment you may need to make is what we call audio levels, or the volume of the audio. You do that by moving this slider over on the left.
[2:56] Ideally, this audio meter is going to show some orange, and maybe a tiny bit of red, just on the loudest parts of the audio.
Dr. Harris: [3:04] When you’re all done, what you may have is a lot of little pieces that look like this. To export the file, so I have something I can use, I’m going to go up to Share and choose Export Song to Disk. There you go. Now it’s exporting it as an .MP3 file, which then I can import into the video software that we use to make Smarthistory videos.
[3:25] [music]

