Today art supplies are available at the touch of a finger: swipe left to choose from a rainbow of paint colors, swipe right to see precut, primed canvas or boards, and click to add brushes in a dizzying array of shapes and sizes to your basket. But imagine having to make everything from scratch! Until just before the Industrial Revolution, artists and their apprentices just about did it all: they made their own glue, extracted colors from discarded dyed clothing, fashioned their own brushes and drawing tools, and ground pigments in fresh binding media to make paint.
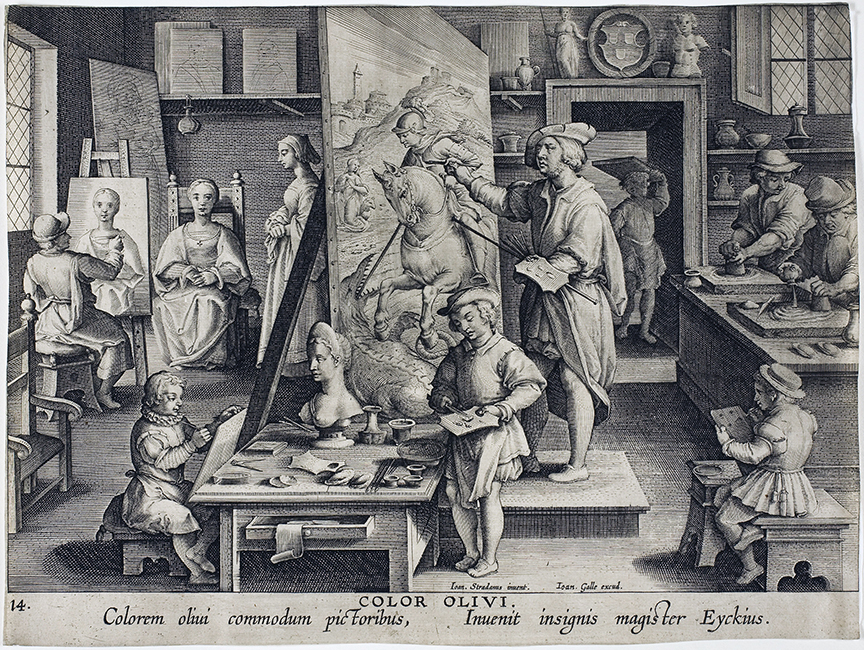
Joannes Stradanus, “Color Olivi” (or The Invention of Oil Painting), engraved and published by Philips Galle in Nova Reperta (“Modern Inventions”), c. 1600, engraving on paper, 20.3 × 27 cm (Art Institute of Chicago)
Today, concern about the potential loss of this kind of practical knowledge makes the reconstruction of paintings using traditional methods an important exercise for students of painting conservation. It helps us better understand how paintings were made in the past, as well as why they appear the way that they do now. Most importantly, having a hands-on understanding of artists’ materials informs the decisions that we make when conserving paintings for future generations.
What follows is a step-by-step description of my attempt to re-make a small portable triptych. I was able to study the original painting, Madonna and Child with Saints and the Crucifixion by a follower of Duccio that was in the Conservation Center for treatment. By following a fourteenth century handbook for artists, Cennino Cennini’s Libro dell’arte, I learned the various stages of making the triptych using traditional methods, including carving the wood, making gesso, water gilding, burnishing, punchwork, and egg tempera painting.
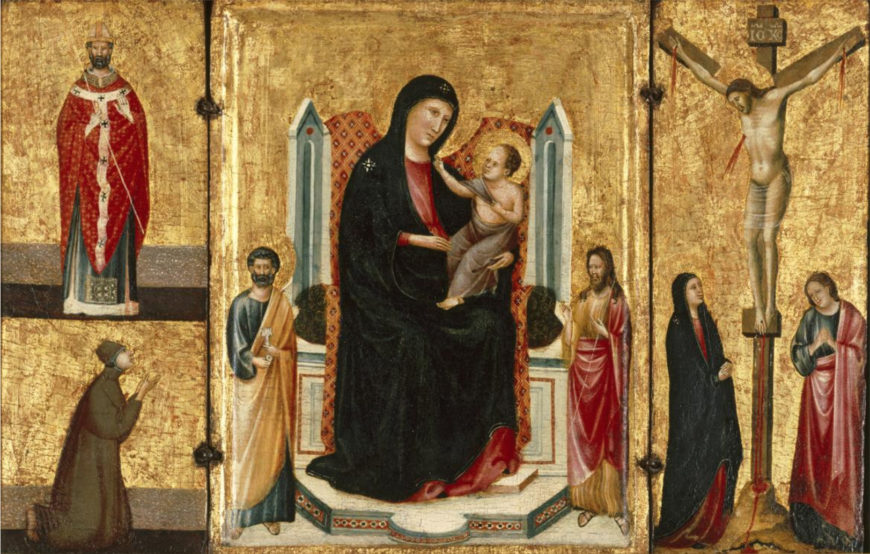
Follower of Duccio, Madonna and Child with Saints and the Crucifixion, c. 1300–1325, tempera on wood panel, 26.4 x 42.5 cm (Kress Collection, Memphis Brooks Museum of Art)
Making the wood panels
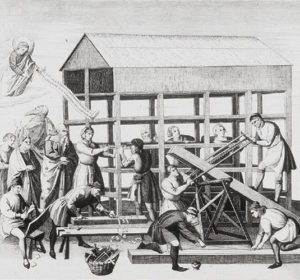
Reconstruction drawing after fresco of a woodworker’s workshop. Piero di Paccio, Noah and his Sons building the Ark, 1389–91, fresco (Composanto Monumentale, Pisa) engraving by Giovanni Paolo Losinio, Pitture a Fresco del Camposanto di Pisa disegnate da Giuseppe Rossi ed incise dal Prof. Cav. G. P. Lasinio figlio, plate 20, 1832 (Victoria & Albert Museum)
In early Renaissance Italy, specialized artisans such as woodworkers, stone carvers, and painters were members of separate guilds, which regulated their activities. Members of the Arte di Maestri del Legname, or Woodworkers Guild, prepared panels for painters, but they also made cassone, boxes, and cabinets. Painters are known to have joined the Woodworkers Guild in order to have the right to carve their own panels. Because the Madonna and Child with Saints and the Crucifixion comprises three panels and was joined with specialized hinges, it was probably carved in the workshop of a carpenter.
I chose to carve the three panels out of cottonwood (Populus tremulus) because it is in the same family as the most commonly found wood in Italian paintings, poplar (Populus alba), and shares many of the same properties. The panels are rectangular and flat, and the central panel has a recessed, or carved out, simple frame. It was a fun challenge only using hand tools, some of which I bought in Florence and others that were handed down to me by my father, who was also a woodworker.
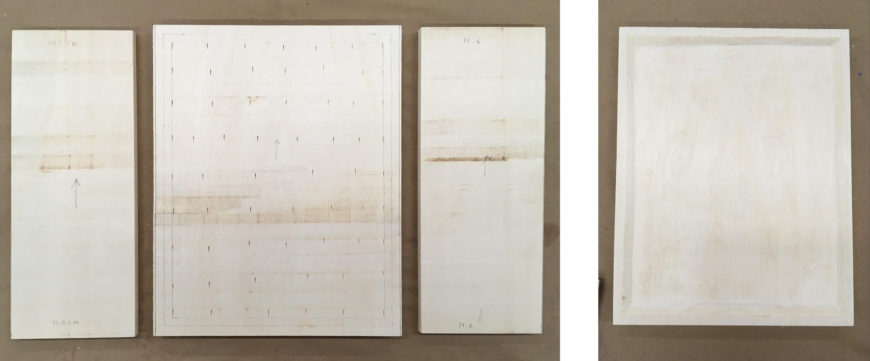
Left: shaping the three poplar panels for reconstruction; right: central panel with the carved-out frame (photographs by author)
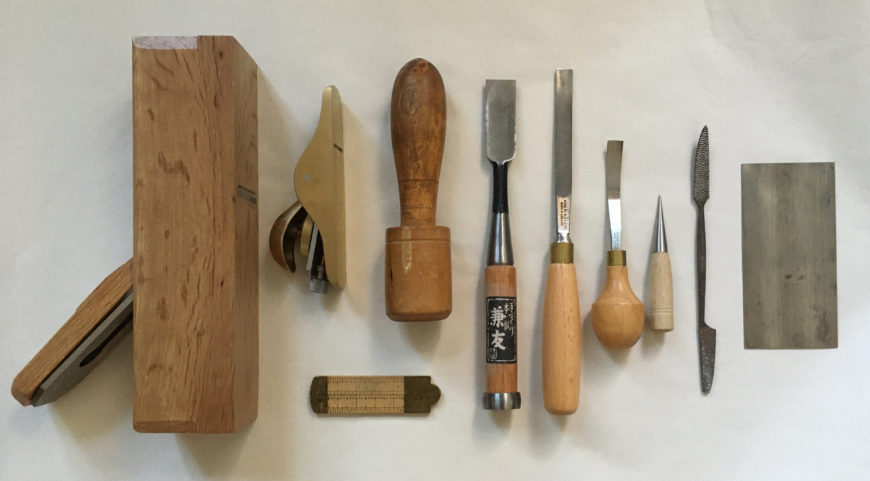
Tools used to shape wood (left to right): block plane, sole plane, ruler, mallet, flat chisel, straight gouge, curved gouge, awl, rasp, and cabinet scraper (photograph by author)
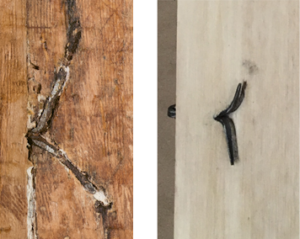
Splayed hinges on the back of the original triptych (left) and reconstruction (right). Photographs by author
The back of the original triptych was bare of paint and showed how the gangherrelle hinges that joined the panels had been drawn through them, bent, and hammered into the back of the wood. I was able to obtain traditional hinges made in Florence for my triptych and quickly realized that seeing this type of hardware in early Italian paintings signifies important characteristics, such as the triptych’s function as a portable devotional object that could be closed and transported. Two candle burns on the back of the left wing confirmed that this triptych was likely used as a private altar.
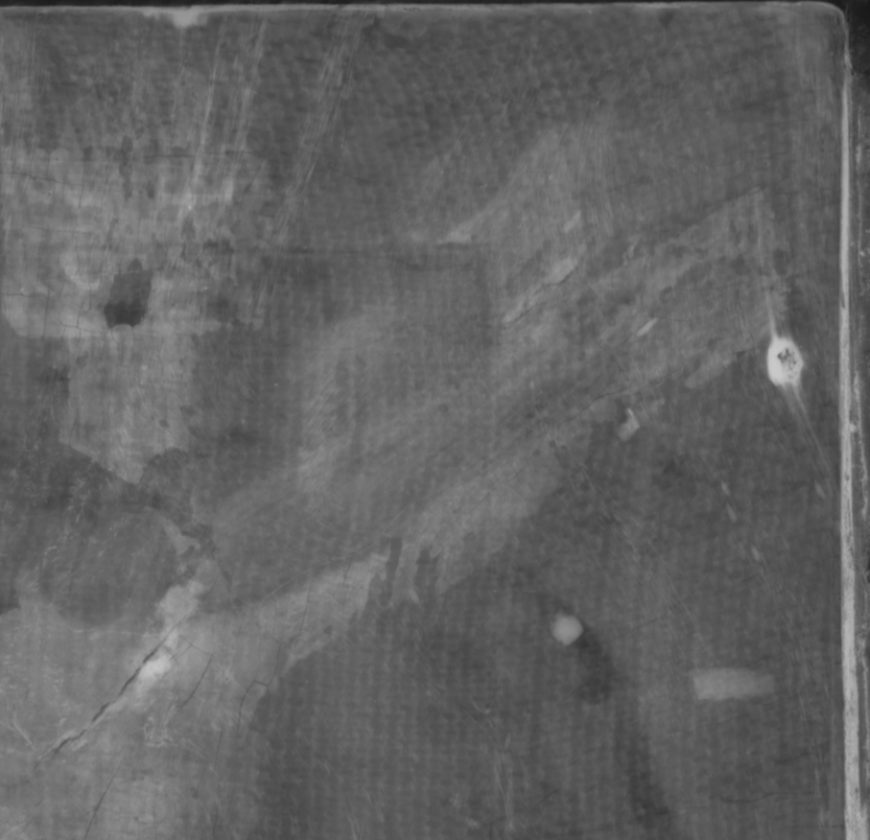
The X-radiograph of the Madonna and Child triptych revealed the woven pattern of a textile, probably linen, layered between the wood and the gesso on each of the three panels (gesso is a layer of gypsum and glue that seals the wood and provides a smooth, bright white surface for drawing and painting on). This is just as Cennini instructed artists to do in Il libro dell’arte. So, a couple of days before I was ready to apply the gesso, I dipped three pieces of linen in warm glue and used my fingers to smooth them over the front of the panels. The textile helps to protect the paint layers from the wood when the wood expands or shrinks due to changes in humidity, but it also results in a specific craquelure (a network of fine cracks) pattern on the front: straight lines that are perpendicular to the grain of the wood.
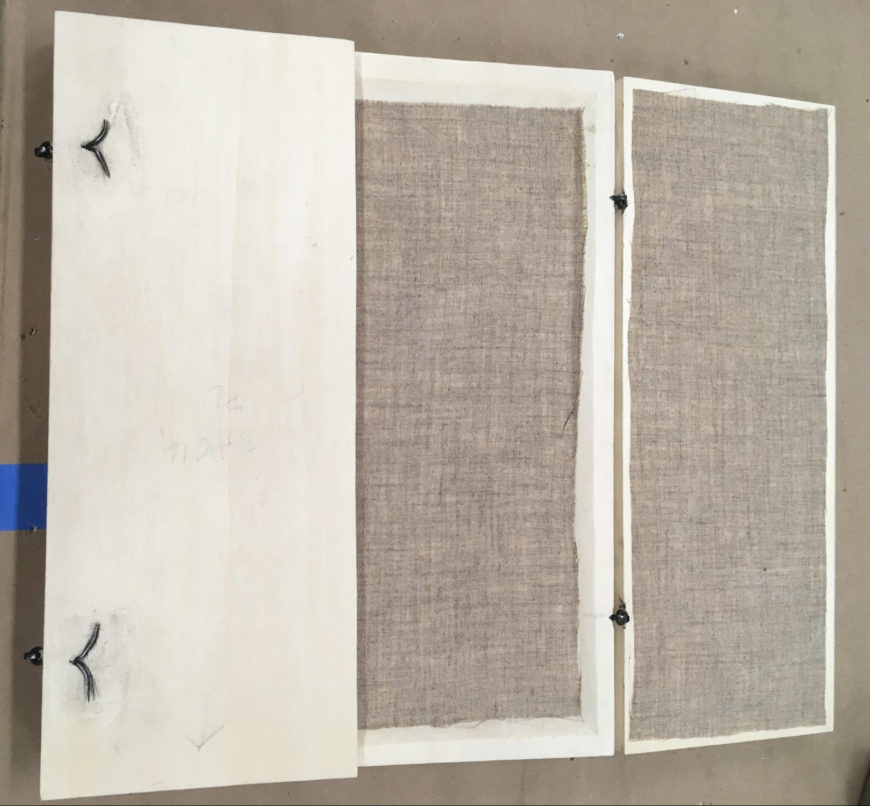
Reconstruction with one wing closed showing the linen glued onto the flat areas. Photograph by author
Gesso
Gesso is a layer of gypsum and glue that seals the wood and provides a smooth, bright white surface for drawing and painting on. It can take months to make: soaking the gypsum in water hydrates the molecules, making it into a moldable material that hardens, but does not shrink, upon drying.

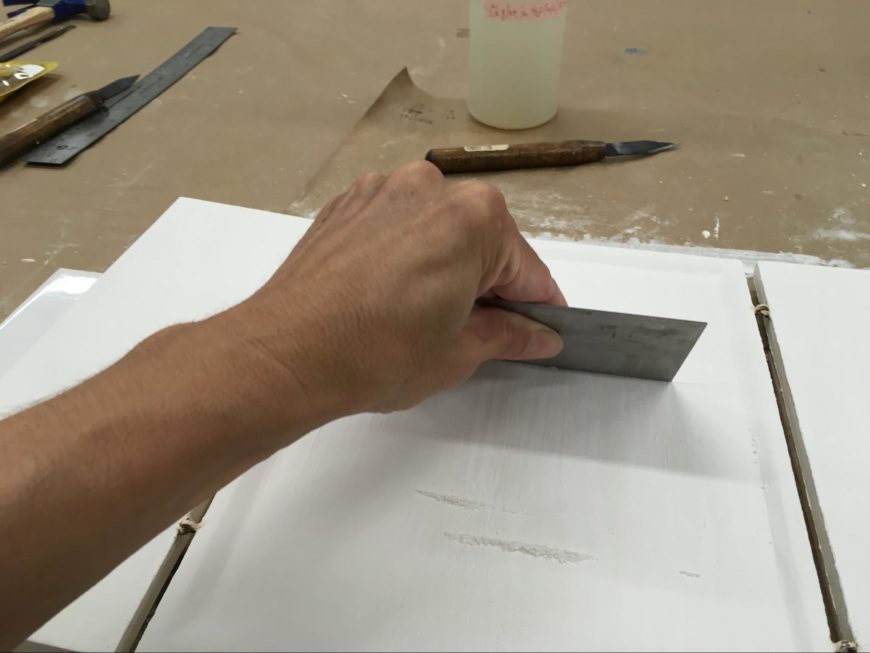
Left: making gesso, slaking and filtering the gypsum; center: scraping the gesso into a cake; right: the dried gesso cakes (photographs by author)
I mulled the dried gesso cakes with warm glue, so that the consistency was like that of a thin pancake batter. Then I applied a total of twelve coats of gesso, allowing each to dry until they felt cool to the touch, and making sure to sand and scrape the surface smooth between each coat. It was hard to resist touching the silky smooth surface, but I had to! The grease from my fingers would have made gilding and painting more difficult later on.
Transferring the drawing
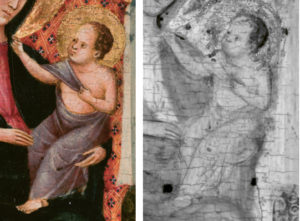
Left: detail of the Christ child in a visible photograph; right: infrared reflectograph showing changes to the position of the child’s legs, drapery, and possibly the foot
Some drawing was visible under the paint by looking at the painting with a specialized infrared camera. The artist probably drew the image directly onto the prepared panel with a brush in a liquid medium, such as ink, without a preparatory drawing. Changes in the position of the Christ child’s leg and drapery, or pentimenti, are further evidence of an improvisational drawing. A closer look reveals broad strokes of ink wash in the Madonna’s drapery. This type of drawing had an important function: the colors applied over wash appeared darker without mixing large amounts of dark pigments into the colors.
For my triptych, I adapted a method of transferring drawings to canvas, walls, and copper plates for painting and engraving that has been used by artists for centuries. But rather than using a drawing, I printed out an image of the painting that was the exact size as the triptych. I rubbed charcoal on the back of the printer paper, and laid it gently down so that the charcoal side was on top of the gesso. I then used a sharp tool to outline the composition, and the pressure transferred the charcoal to the panels. I fixed the loose charcoal powder by going over it again with diluted black ink and gum arabic.
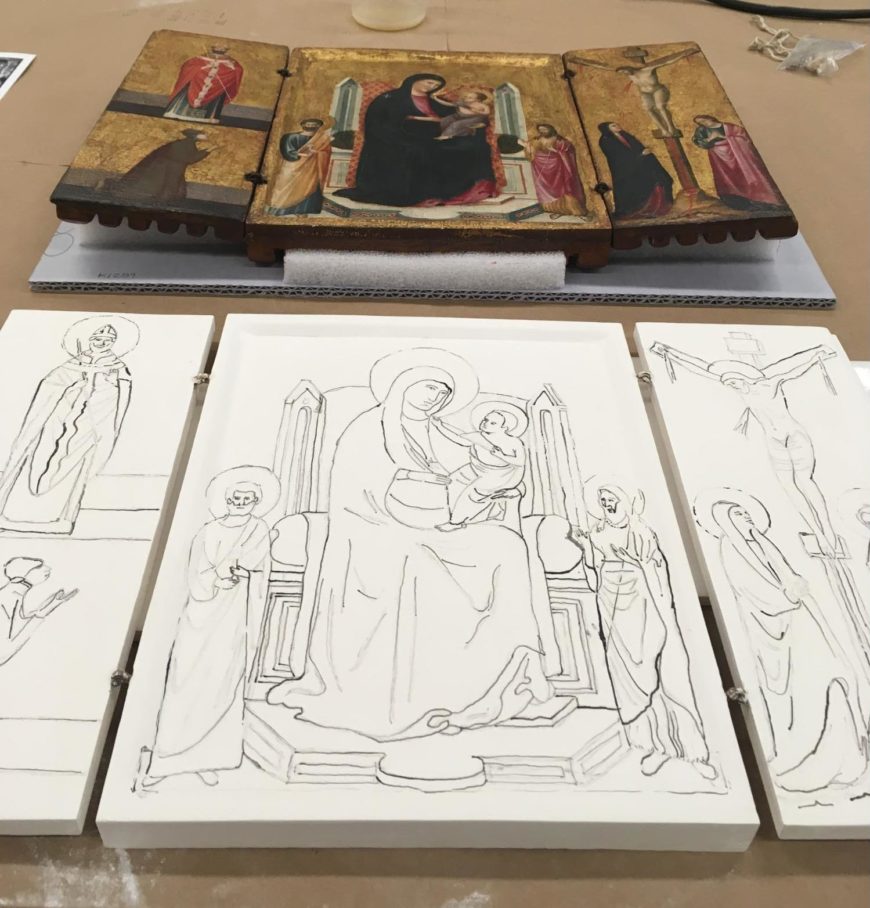
Front: reconstruction with the transferred drawing; back: the original triptych (photograph by author)
Gilding and punchwork
Many Late Gothic Italian paintings are instantly recognizable by their richly gilded and incised surfaces. This appearance connects them to their Byzantine precursors, icons. The brightly colored paint and gold leaf mimic the solid gold, silver, jewels, and other precious metals and stones described by Paul the Silentiary in 563 C.E. in his poem about the liturgical furnishings of Hagia Sophia in Constantinople (today Istanbul).
After I prepared the areas that I wanted to gild with clay bole, I brushed the bole with water and laid the sheets of gold leaf down with a gilder’s tip (a type of brush) and knife. The sheets are usually all about the same size and slightly overlap each other so that no bole shows through. Sometimes you can see this overlap in paintings from the early Renaissance and can estimate the size of the gold leaf sheet that was originally used.
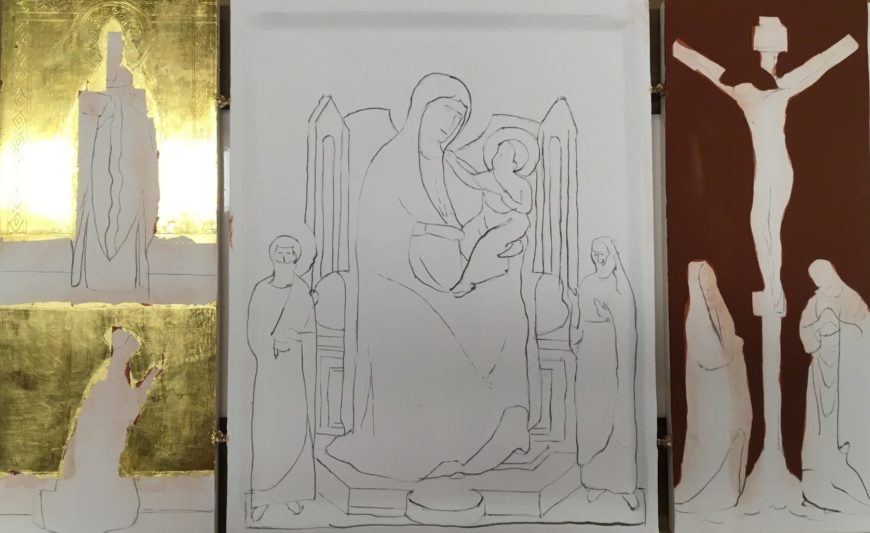
The reconstruction at three stages: with the drawing (center panel), with the bole (right), and after gilding (left). Photograph by author
One of the tricky parts of gilding is the ambient temperature and humidity in your workspace—Cennini advises that gilding should take place when it is “damp and rainy.” Humidity increases the working time because the bole (after gilded) dries more slowly and allows extra time for burnishing, as well as incising and punching the gilt surface. When you try to punch into a gilt bole that is too wet, the gold can break, and if it’s too dry the bole can flake off.
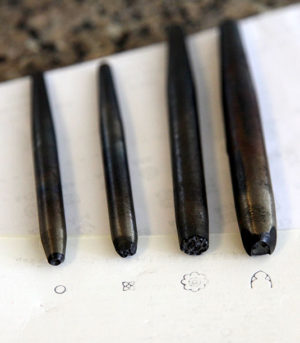
The only punchwork on my triptych was a simple round shape, but the other tooling in the haloes and borders was all hand-drawn, which requires a lot of time to execute. And I happened to be working on my reconstruction indoors in the summer, which means air conditioning and dry air (not the damp atmosphere advised by Cennini): not a lot of time to work! So I experimented with incising the decorations in the bole prior to gilding to see if they would still be visible. Fortunately this worked and I was able to incise first, lay down the gold leaf, and then burnish the gold to a high polish.
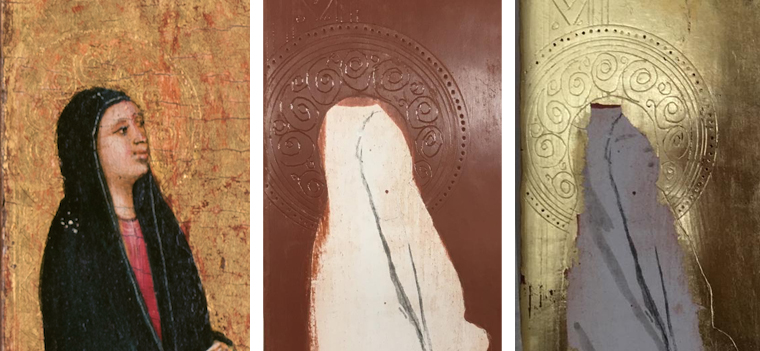
Left: detail of the halo of Mary on the Crucifixion panel in the original; center: detail of halo incised in bole; right: halo after gilding in the reconstruction (photos by author)
Preparing and applying paint
Madonna and Child with Saints and the Crucifixion is painted in egg tempera, a water-based paint medium that has a durable, opaque finish with a slight sheen. Because it dries quickly, the paint must be applied in quick, short strokes and built up for coverage. These hatch marks of overlapping color are characteristic of tempera paintings developed during the Late Gothic and into the Italian Renaissance.
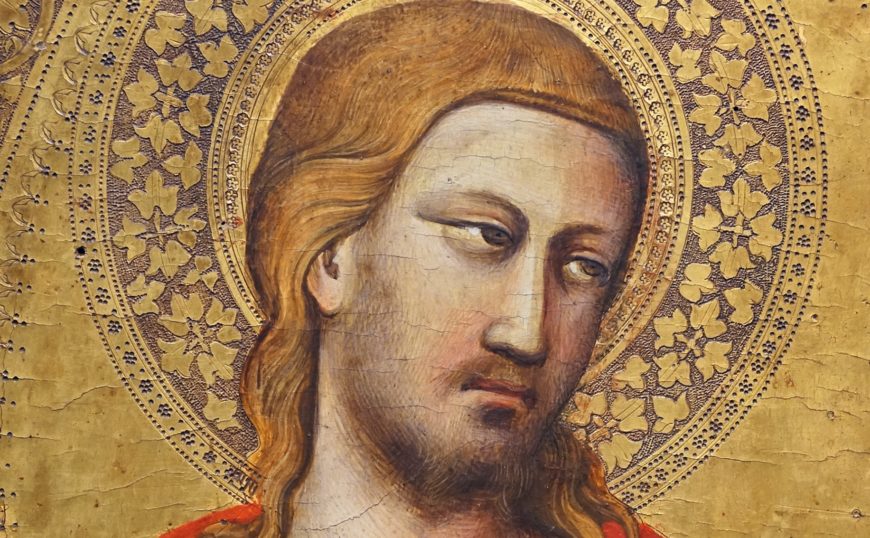
Punchwork visible in the halo, and hatchmarks visible in Christ’s face (detail), Taddeo Gaddi, Saint Julian, 1340s, tempera on wood, gold ground, 54 x 36.2 cm (The Metropolitan Museum of Art)
Egg tempera is prepared by first grinding powdered pigments (azurite, earth colors, red lead, vermilion, red lake, and lead white) in a small amount of water. This paste is then scooped into a small sea shell and tempered with the egg yolk.
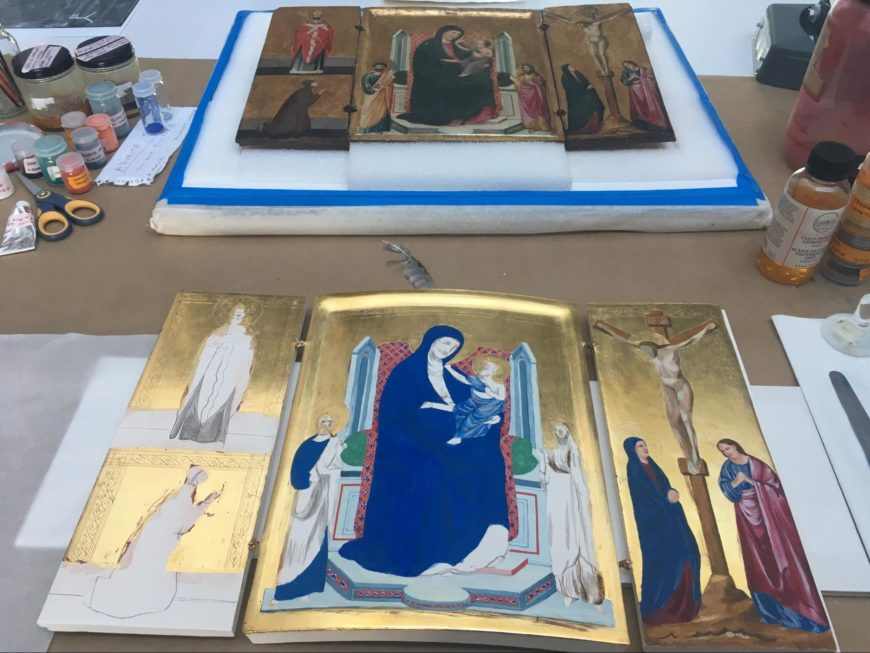
Painting the triptych with traditional pigments while looking at the original in the background as a guide for the choice of pigments and their application. Photograph by author
Working quickly in small batches of color, I followed Cennini’s instruction for painting, first laying in mid-tones of color followed by highlights (mixing color with white) and shadows (mixing with small amounts of black or brown). This surprisingly simple method was complicated by the artist’s use of pure red lake glazes (pigment made from from organic dyestuffs, instead of minerals) in areas of deep shadow, such as the blue drapery of the Cardinal saint and the Christ child’s drapery. Instead of mixing colors to achieve a darker color (which would have resulted in a muddy mess), red paint was glazed over blue to add depth and intensity.
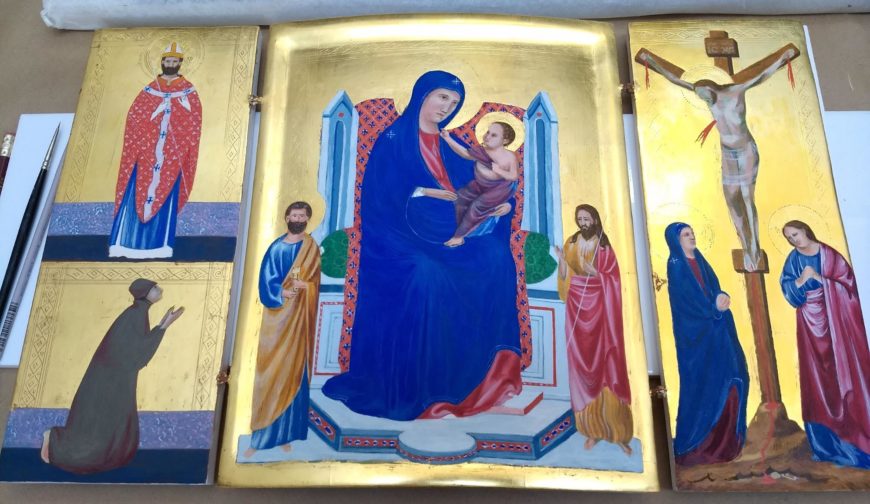
Glazes of red lake paint in areas of shadow in the blues make them appear more vivid and the forms more sculptural. Photo by author
Conclusion
Having worked with these materials translates to better understanding why this painting looks the ways it does now, and also how to care for it in the future. One of the most obvious differences to me is the brilliance of the colors in the reconstruction. Because I was able to study the original and chose the same pigments, I have a new appreciation for the range of colors that might have been desired in the fourteenth century. The intensity of color and brilliance of the gold must have been dazzling when surrounded by candles. Above all, I have come away in awe of the skill and knowledge required to make the Madonna and Child triptych.
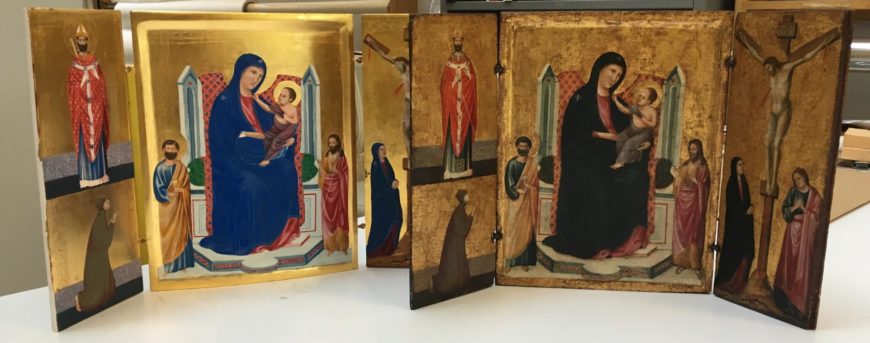
Reconstruction (left) of the Madonna and Child with Saints and the Crucifixion (right). Photo by author
Additional resources
Art in the Making – Italian painting before 1400
The Conservation Center, Institute of Fine Arts, New York University
Cennino Cennini, Il libro dell’arte, trans. Daniel V. Thompson (New York: Dover Publications, 1933)
Looking at Paintings: A Guide to Technical Terms / eds. Tiarna Doherty and Anne T Woollett (Los Angeles: J. Paul Getty Museum, 2009)
Jo Kirby and David Bomford, Italian Painting before 1400 (London: The National Gallery, 1989)
Skaug, Erling. Punch Marks from Giotto to Fra Angelico: Attribution, Chronology, and Workshop Relationships in Tuscan Panel Painting: with Particular Consideration to Florence, c.1330–1430 (Oslo: IIC, Nordic Group, the Norwegian section, 1994)

